Subscribe your WordPress site visitors to your MailChimp lists, with ease.
Installation
The plugin is integrated into the theme so after theme activation, you will be asked to install it.
Updates
As any other plugin from wordpress.org site, if new version of the plugin is available, you will be notified about it.
Setup
After activating the plugin, its configuration page will be accessible in the WP Dashboard main menu.
To use the plugin, you have to complete at least these 3 steps:
- In the WP Dashboard > MC4WP > Mailchimp, enter your API Key to connect with the Mailchimp service.
- In the WP Dashboard > MC4WP > Form, create a new form.
The important part is to keep the EMAIL INPUT right after the LABEL tag, NOT INSIDE IT
<p>
    <label>Email address: </label>
    <input type="email" name="EMAIL" ... />
</p>- In the WP Dashboard > MC4WP > Form > Settings tab, select a list to use with the form (field: Lists this form subscribes to).
For more information, please refer to the plugin page.
Available Slots
The theme integration allows you to display your newsletter form in the following locations:
- popup – shows up when a user tries to leave from your site
- slide up – slides up from the bottom when user is scrolling down a page
- before collection – before posts main feed on home
- in collection – injected into posts collection (home, archives)
- after post content – after a post content
- before footer – before the footer area
- widget – in a sidebar
- builder element – inside a page built upon the WP Bakery Page Builder
Set Up Slots
Auto-Injected Slots
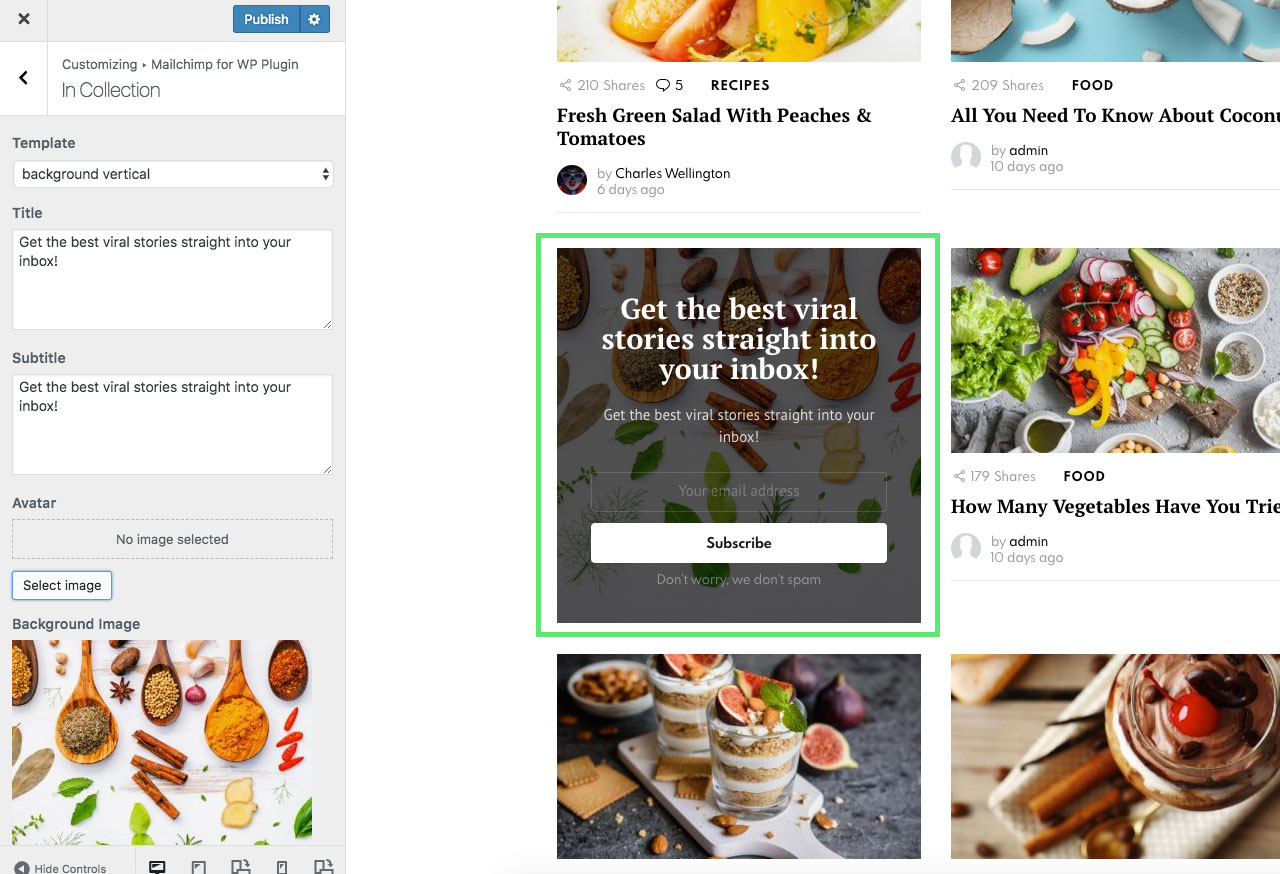
You can customize all theme’s auto-injected slots (popup, inside a collection, etc) via WP Dashboard › Appearance › Customize › Mailchimp for WP Plugin panel.
Slot options:
- template – horizontal or vertical, with or without background
- title
- subtitle
- avatar
- background image – works only with template that supports background (background horizontal and background vertical)
Builder Element
All options for the builder newsletter element are available directly inside the element.
Enable/Disable Slots
You can control visibility of every single newsletter slot separately. Here’s where you can find options for that:
- popup – WordPress Admin › Appearance › Customize › Mailchimp for WP Plugin › Popup › Enable
- slide up – WordPress Admin › Appearance › Customize › Mailchimp for WP Plugin › Slide Up › Enable
- before collection – WordPress Admin › Appearance › Customize › Home › Before Main Collection › Show Newsletter
- in collection:
- Home – WordPress Admin › Appearance › Customize › Home › Main Collection › Newsletter
- Other archives – WordPress Admin › Appearance › Customize › Posts › Archive › Newsletter
- after post content – WordPress Admin › Appearance › Customize › Posts › Single › Hide Elements › Newsletter
- before footer – WordPress Admin › Appearance › Customize › Footer › Modules › Show Newsletter
- widget – just add/remove the Mailchimp Sing-Up Form widget from your sidebars
- builder elements – just add/remove the Bimber Newsletter Form element using the WP Bakery Page Builder (check the Bimber tab while adding elements)
Change Texts
If you want to change default phrases, like “Get the best viral stories straight into your inbox!” or “Don’t worry, we don’t spam”, you can do that via WP Dashboard › Appearance › Customize › Mailchimp for WP Plugin section.
Every newsletter location (popup, after post content, etc) has its own panel.