Verify Your Account
After adding Google AdSense, you may be asked to verify your site. We recommend doing that using Bimber’s Tracking Codes panel.
Please follow these steps to verify your account:
- Go to your Google AdSense account
- In the Connect your site to AdSense screen, click the Copy Code link
- Go to the WP Dashboard > Appearance > Theme Options page
- Choose the Tracking tab
- Put the code into the Tracking code (in <head>)
- Go back to the Google AdSense
- Check the I’ve pasted the code into my site checkbox
- Click Done
- Wait for an email from Google confirming that your account is approved (this may take from 1 day up to two weeks)
Create AdSense Ad
To create a new AdSense ad in the theme, please do as follows:
- Go to your AdSense account and create a new ad
- Copy the ad code and go back to the WP Dashboard
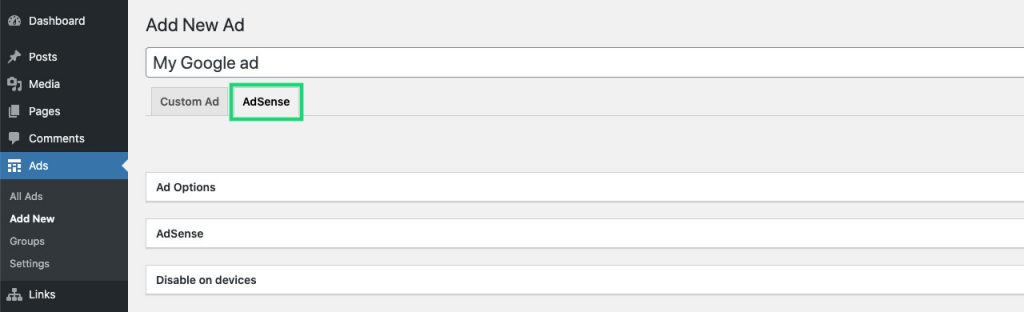
- Create a new ad via WP Dashboard > Ads > Add new
- Provide a descriptive title and choose the AdSense tab
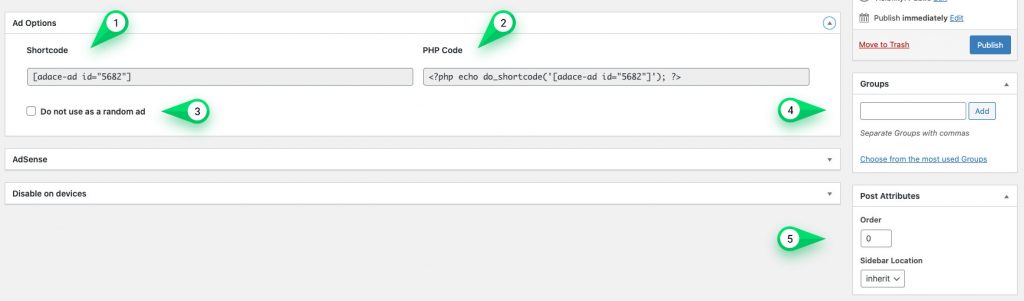
- In the Ad Options section (screen below), you can find the following options:
- Shortcode. Paste into the post to display the ad
- PHP Code. Use in your custom templates
- Do not use as a random ad. When you set an ad location to display random ads, this ad will be skipped
- Groups. Similar to post categories, here you can assign the ad to ad groups
- Order. When displaying ads from a group, ads with the higher Order will be displayed first
- In the AdSense section (screen below), you can find the following options:
- AdSense Code. Paste AdSense code here and, if valid, it will be automatically imported into the settings below. If you paste the code and it will disappear, leaving the setting below empty, that means the ad code can’t be used here. It’s probably the Google Auto Ad. Read below what is that and where to place it to use
- Ad Slot ID. Google AdSense ad slot ID
- Publisher ID. Google AdSense ad published ID
- Type. The Responsive ads stretch automatically to their location, the Fixed-size ads have sizes set in pixels
- Depending on the selected Type, the options here are:
– Width and Height for Fixed-size ads. Define the ad size in pixels
– Format for Responsive ads: Auto, Fluid, Vertical, Horizontal, Rectangle - Custom ad sizes for devices. This section is only for the Fixed-size ad Type.
You can use it to change the ad size per device. Leave empty to use the Width and Height values

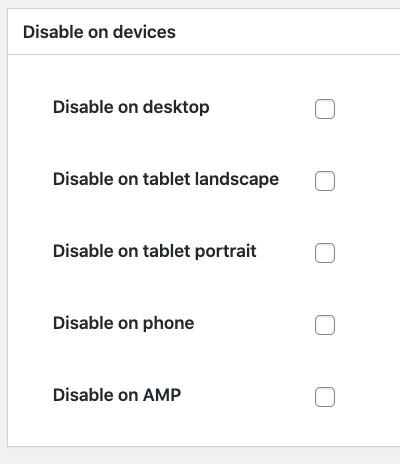
- In the Disable on devices section (screen below), you can disable the ad on a specific set of devices. Check the Ad Visibility page for details.
Assign AdSense Ad to a Slot
When you have your ad created, it’s time to decide where it should be displayed. To display an ad, you have to assign it to an ad slot. Please refer to the Ad Slots page for details.
Auto Ads
Auto ads are not designed to be used within ad slots. Instead, you place one piece of code on all pages across your site. Auto ads will then scan your site and automatically place ads where they’re likely to perform well and potentially generate more revenue.
Here’s an example of the Auto ad code:
<script data-ad-client="ca-pub-1234567890123456" async src="https://pagead2.googlesyndication.com/pagead/js/adsbygoogle.js"></script>As you probably noticed, there is no Slot ID in that code. Missing Slot ID indicates that this ad doesn’t work with Ad Slots.
Here’s another example:
<script async src="https://pagead2.googlesyndication.com/pagead/js/adsbygoogle.js"></script>
<script>
(adsbygoogle=window.adsbygoogle||[]).requestNonPersonalizedAds=1;
(adsbygoogle=window.adsbygoogle||[]).push({google_ad_client: "ca-pubxxx", enable_page_level_ads: true});
</script>
The most important and worth to notice line is:
enable_page_level_ads: trueWhen you see the enable_page_level_ads flag set to true, you can be sure it’s Auto ad.
To add Auto ad code to your site, please use our Tracking Codes panel. Put the ad into the Tracking code (in <head>) field.
Please refer to the Google’s Auto Ads document for details.
AMP Auto Ads
Auto ads for AMP work the same as the Auto Ads explained in the section above, the difference they are designed to work with AMP pages.
To add Auto ad for AMP code to your site, please use our Tracking Codes panel. Put the ad into the AMP Tracking code (in <head>) field.
Please refer to the Google’s AMP Auto Ads document for details.