Allow users to log in/sign in using their Facebook, Google and other popular social network accounts.
Requirements
To log in with social networks, the Snax plugin is required.
Locations
The social login links are integrated into:
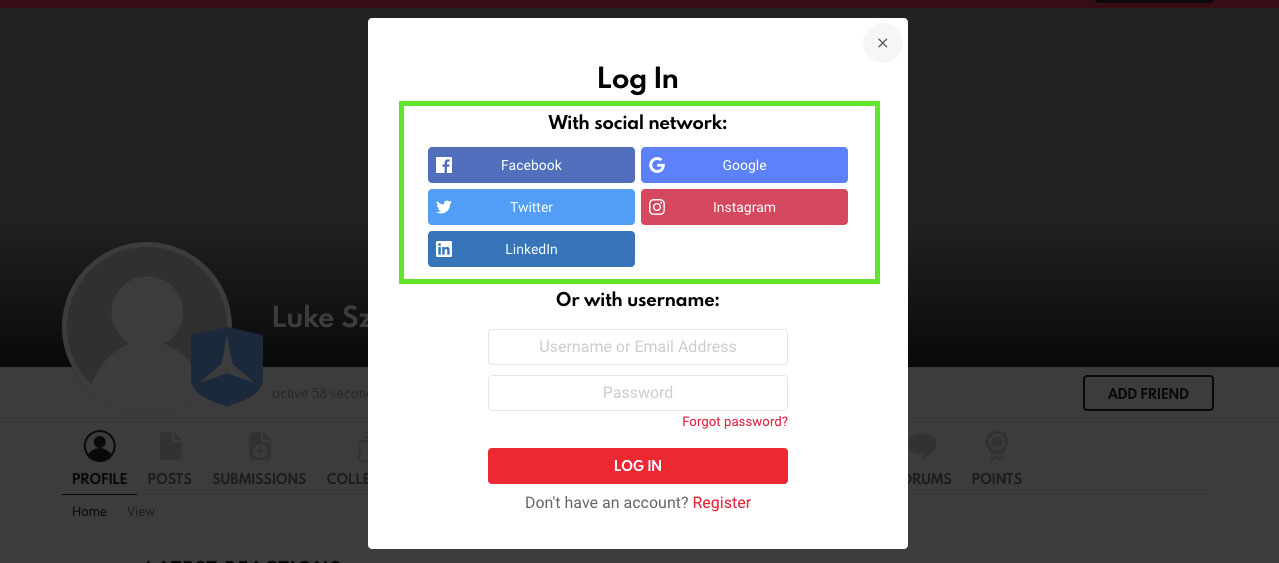
Snax Login Popup
To change buttons template for this location, please go to WP Dashboard › Settings › Snax › Social Login › Locations page.
BuddyPress Registration Page
To change buttons template for this location, please go to WP Dashboard › Settings › Snax › Social Login › Locations page.

Workflow
By logging in using social networks a user:
- DON’T have to fill in a registration form – an account is created under the hood
- DON’T have to activate an account using an activation link – an account is activated immediately, after successful social network authentication
- DON’T have to register again on different site within a network – the existing account is used to grant access to a site
Settings
All module related settings are on the WP admin panel › Settings › Snax › Social Login page.
Enable/Disable
You can enable the social login module on the WP admin panel › Settings › Snax › Social Login page, in the General tab.
Networks setup
Currently, the following networks are supported:
- Vkontakte
To set up the networks, please follow these steps:
- Go to the WP admin panel › Settings › Snax › Social Login section
- Choose the Networks tab
- Check the Enabled box right next to a network you want to active
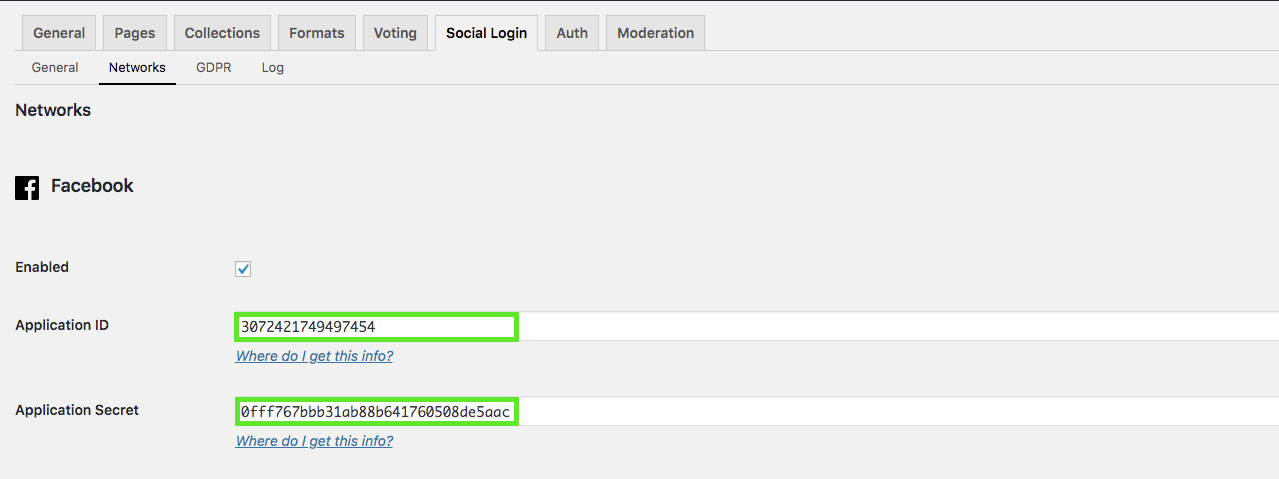
- Provide the Application ID. How to get this info for each network, is explained further on this page
- Provide the Application Secret. How to get this info for each network, is explained further on this page
- Save changes
Before you start, be aware that Facebook accepts only the https:// (SSL) powered sites, and the http:// URL can’t be used to create a new app.
To enable authentication with Facebook, please follow the steps:
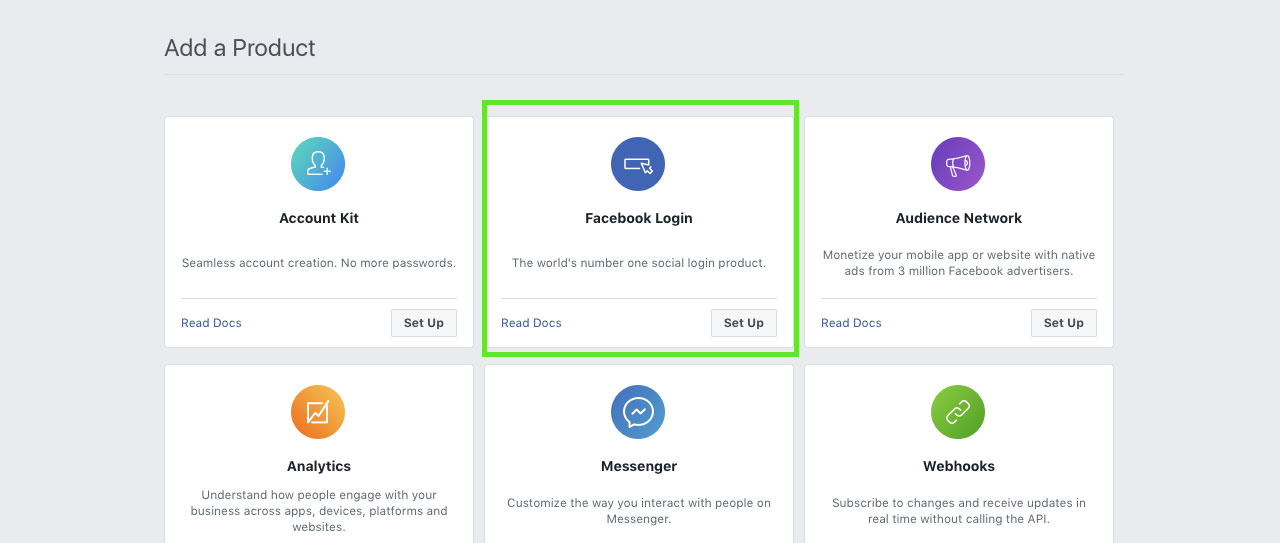
- Create and bind a Facebook application
- Inside the application, find the Facebook Login product (left sidebar) and click the Set Up button below it
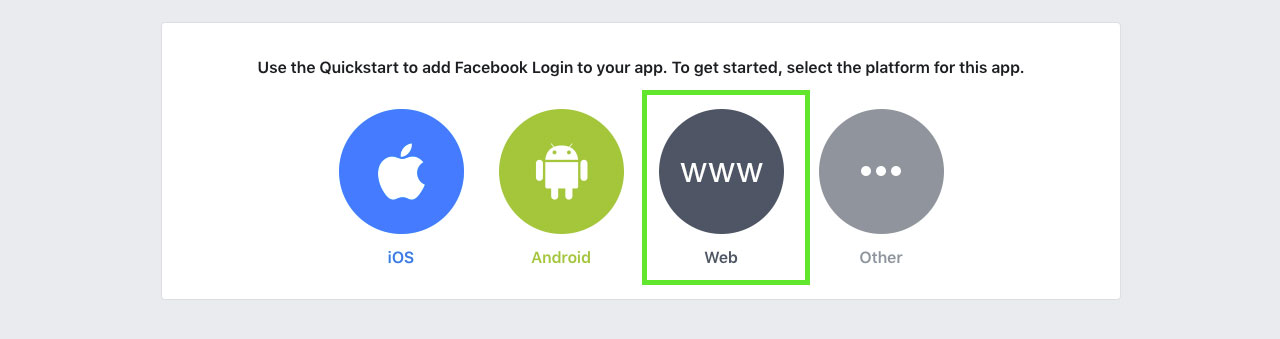
- Click Web from available platforms
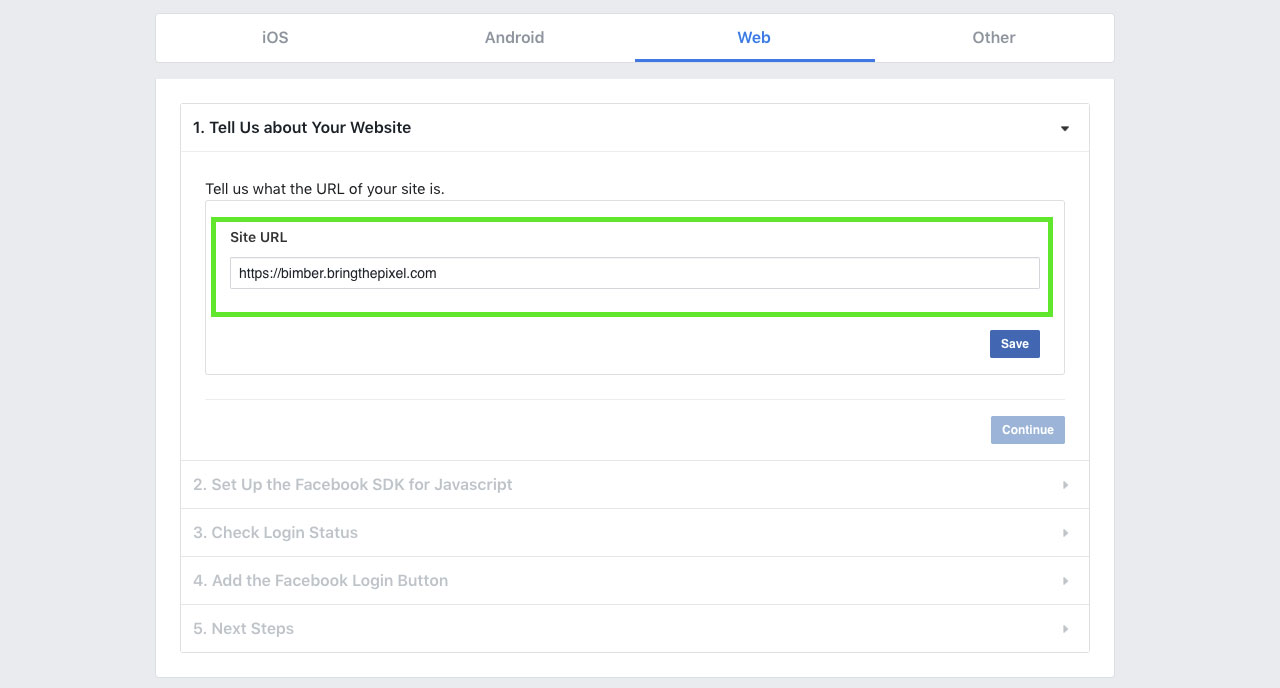
- Provide your Site URL (https:// is mandatory here), click Save and then Continue
- Skip all next steps by clicking Next button
- Now, from the left menu select Settings under Facebook Login product
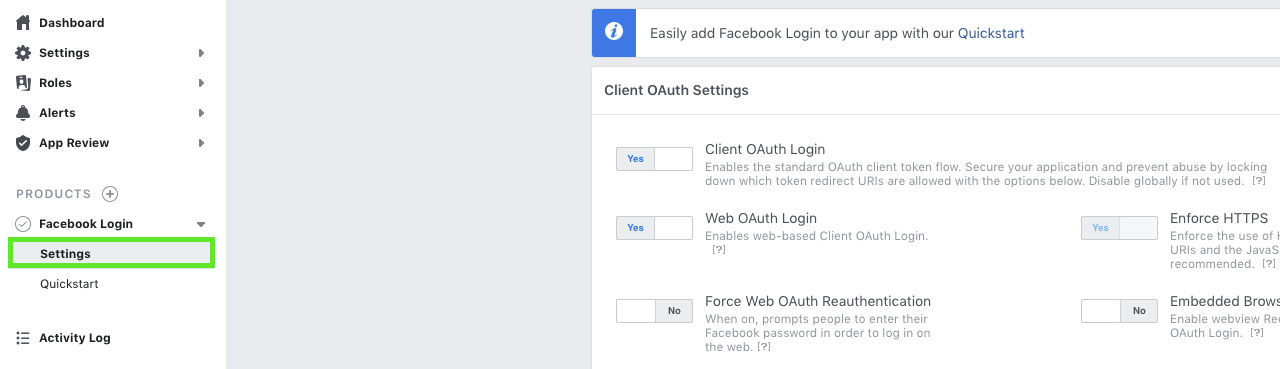
- Return back to your site and go to WP admin panel › Settings › Snax › Social Login › Networks page
- In Facebook section, click Where do I get this info? link
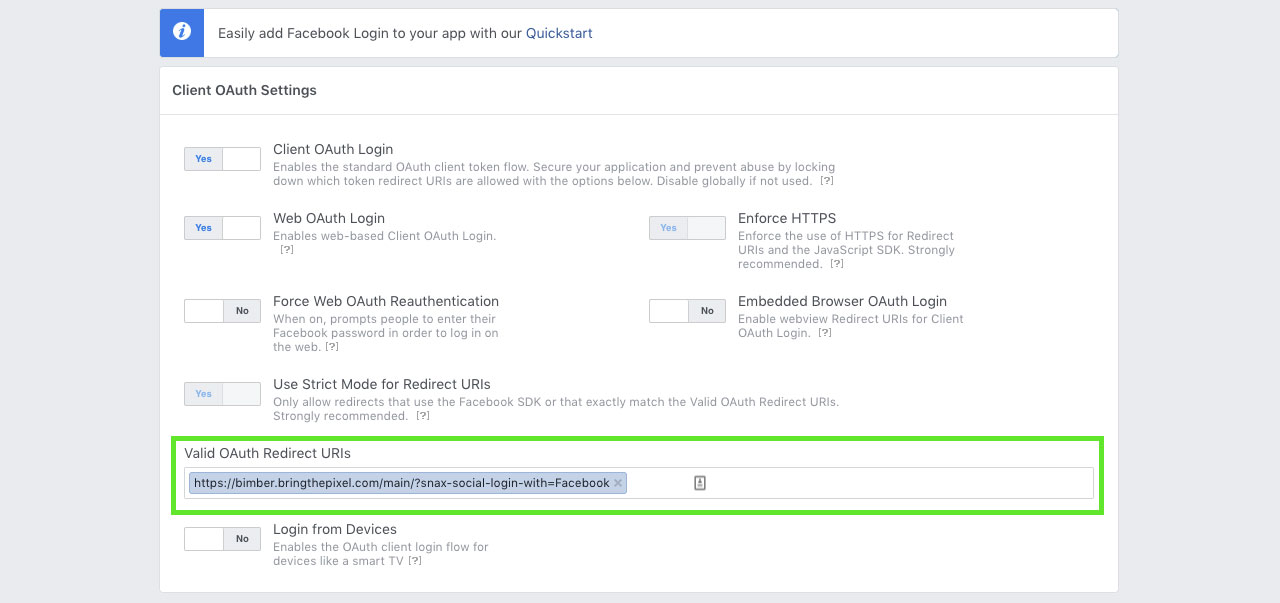
- You should see Valid OAuth Redirect URI, copy it
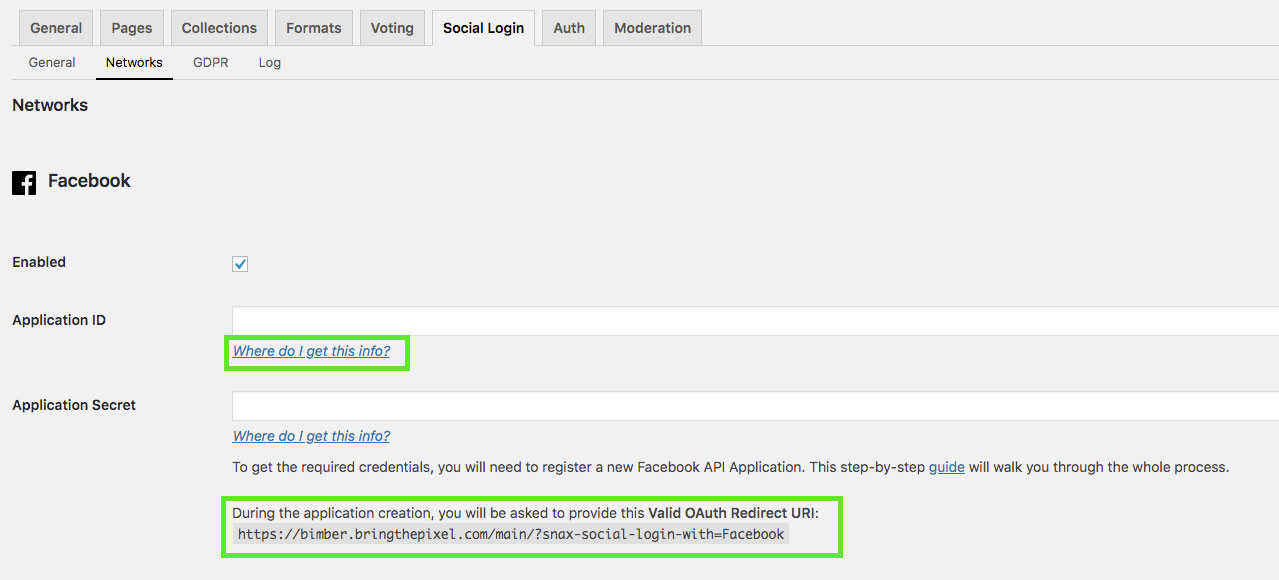
- Paste the copied URL into Valid OAuth Redirect URIs field and Save Changes
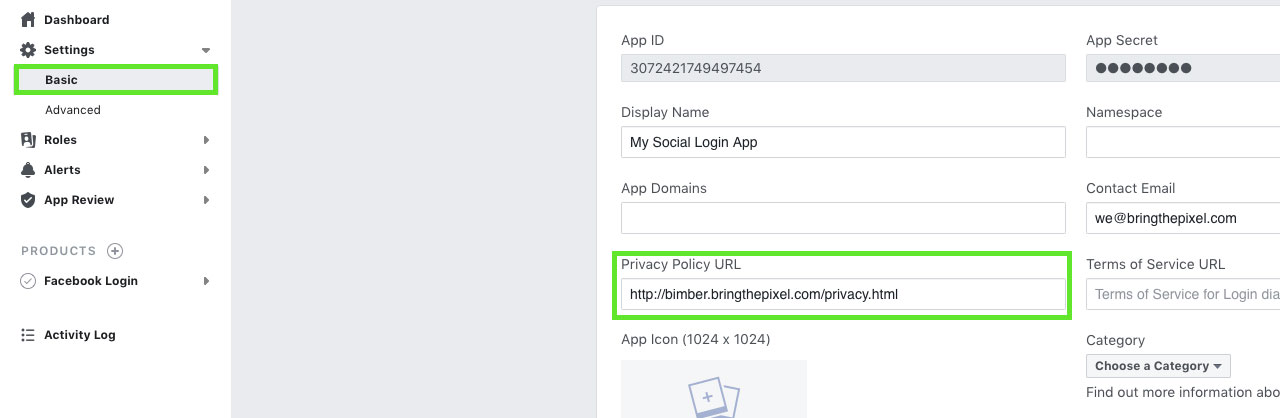
- You have to also provide a link to your site’s privacy policy. It’s required to go live
- To do that, please select Settings » Basic from the left menu
- Fill in Privacy Policy URL and click Save Changes
- You application is currently in development mode. We have to make it live to allow users log in with it
- Click In development switcher on top, right after the App ID, choose Category and click Confirm
- When your app is live, you should see Live as the state of the switcher
- Your app is now ready to use. Go back to WP admin panel › Settings › Snax › Social Login › Networks page and past the created application credentials (APP ID and App Secret) into the Facebook fields
- Make sure that Enabled box is checked
- Save changes
To enable authentication with Google, please follow the steps:
- Go to https://console.developers.google.com
- Click Select a project in top left corner
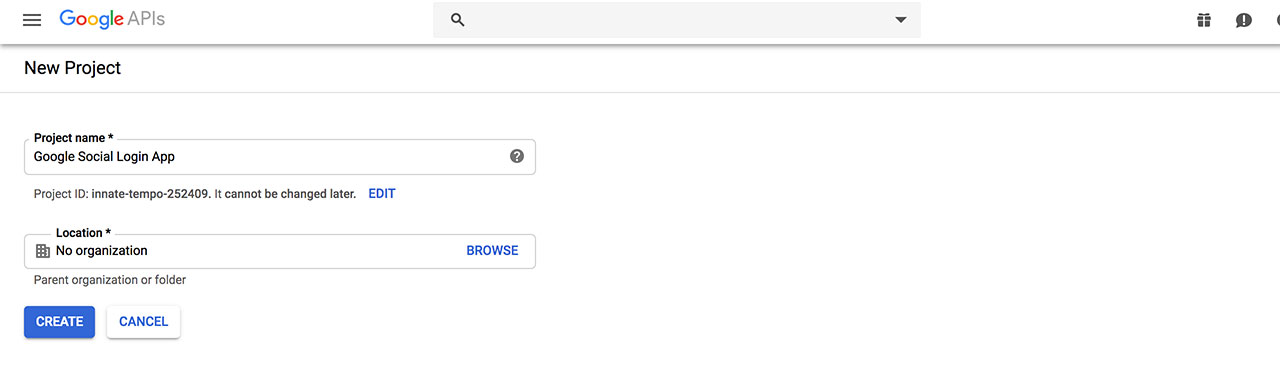
- When projects popup shows up, click New project
- Fill in Project name and Location and click Create button
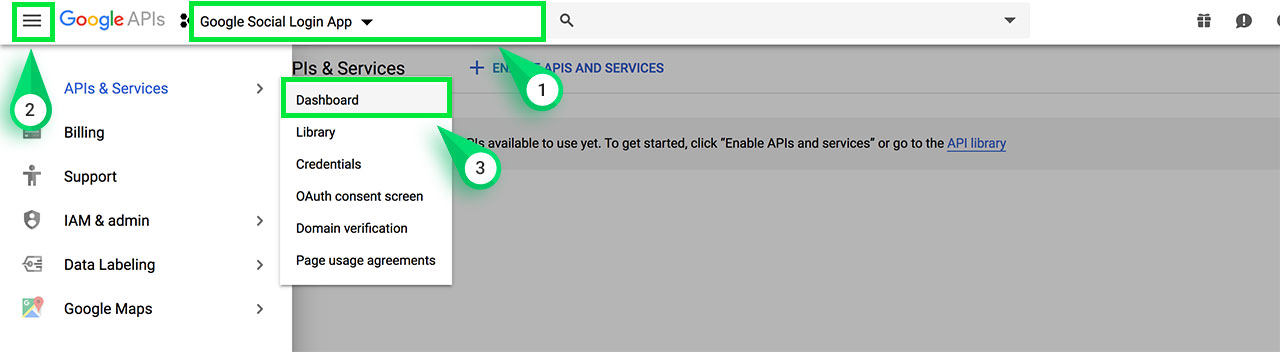
- Once the project is created. Select it (screen, point 1). Then click left side menu (screen, point 2) and go to APIs & Services › Dashboard (screen, point 3)
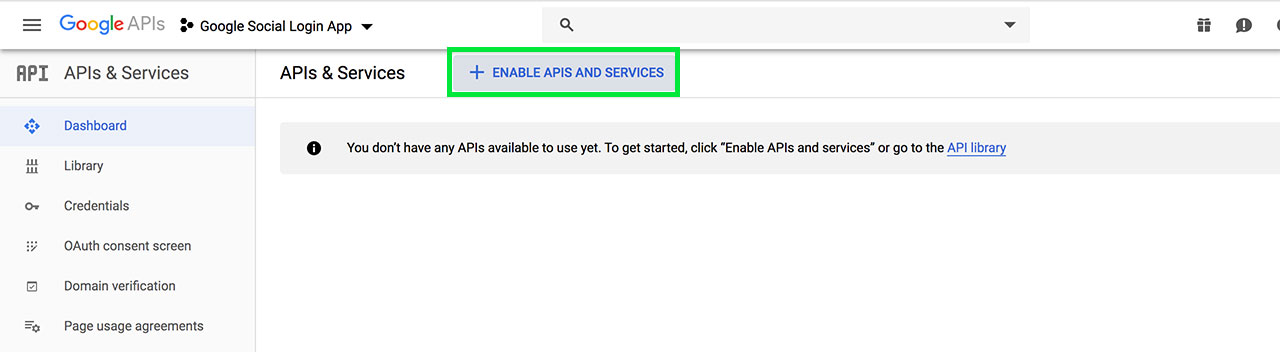
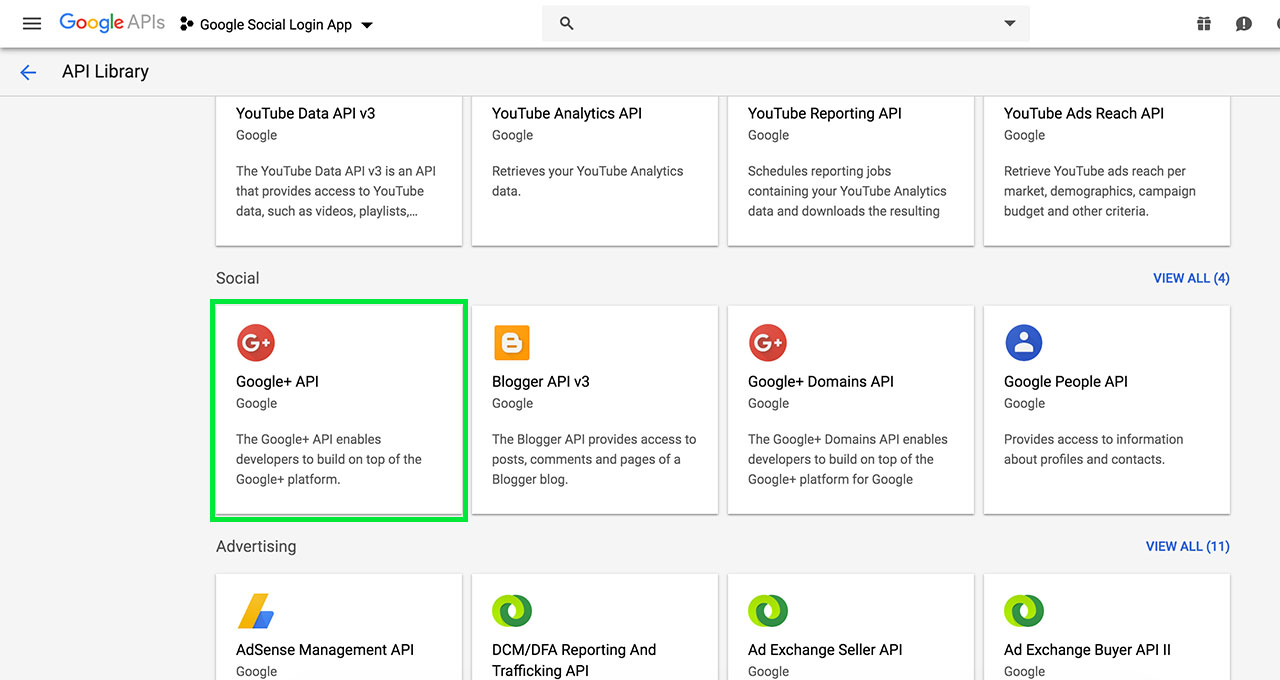
- Click + ENABLE APIS AND SERVICES
- From API Library, select Google+ API and on the next screen click Enable
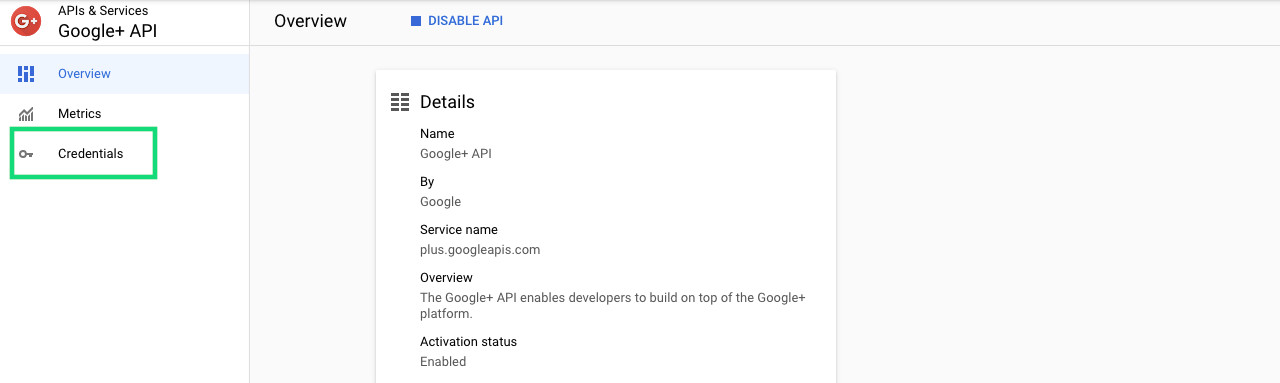
- On the Google+ API screen, click Credentials link
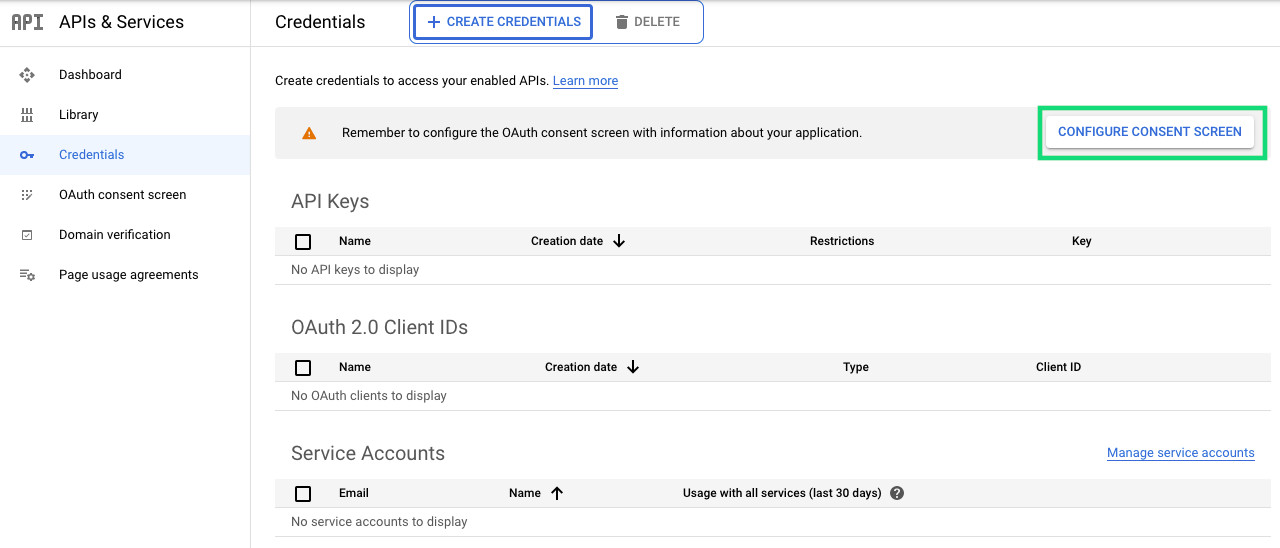
- Now, you have to Configure Consent Screen
- On the first step, choose External type and click Create

- On the next step, fill in:
– App name
– User support email
– Application home page. Your site’s domain, with http(s)
– Application privacy policy link
– Authorized domain. Your site’s domain, without http(s)
– Developer email address
and click Save and continue

- On the Scopes step, click Add or Remove Scopes button and choose:
– email
– profile
– openid
All are non-sensitive scopes so you won’t need to send your app to review. Click Save and Continue to move on

- On the Test Users screen, just click Save and Continue
- On the Summary screen, click Back to the Dashboard
- Now, from the left-side menu choose the Credentials link, and then using the + CREATE CREDENTIALS menu, choose OAuth client ID.
If you can’t see OAuth client ID, select the option Help me choose, and then get back to the Credentials screen, OAuth client ID should be available.

- Select Web application as the application type
- Fill in Name
- Provide Authorized JavaScript origins. It’s your site’s domain
- Provide Authorized redirect URIs. Read the next step from where you can get it

- To get Authorized redirect URI, please return back to your site and go to WP admin panel › Settings › Snax › Social Login › Networks page
- In Google section, click Where do I get this info? link
- You should see Authorized redirect URI, copy it
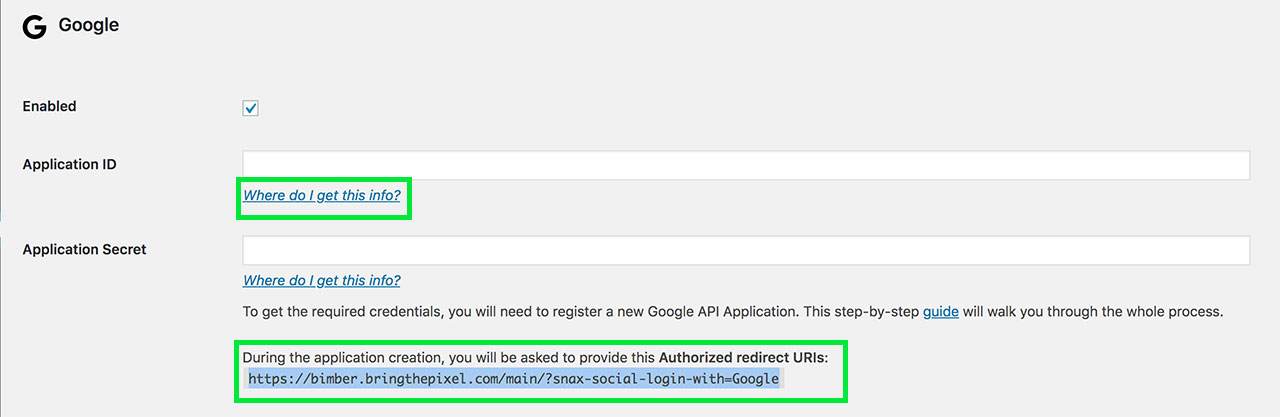
- Paste the copied URL into Authorized redirect URIs and click Create
- Popup with created credentials should show up
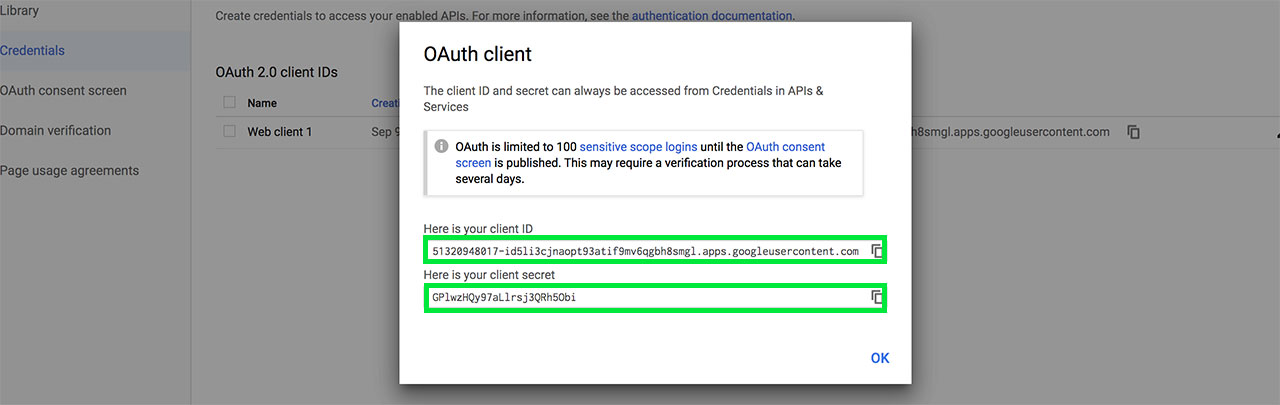
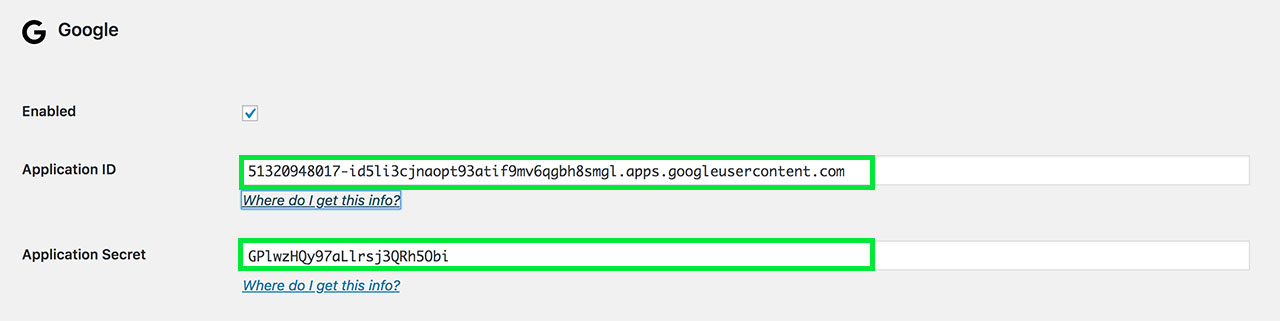
- Go back to WP admin panel › Settings › Snax › Social Login › Networks page
and past the application credentials into the Google fields. Application Client ID into Snax Application ID and Client Secret into Application Secret - Make sure that Enabled box is checked
- Save changes
To enable authentication with Twitter, please follow the steps:
- Go to https://developer.twitter.com/apps
- Click the Create an app button
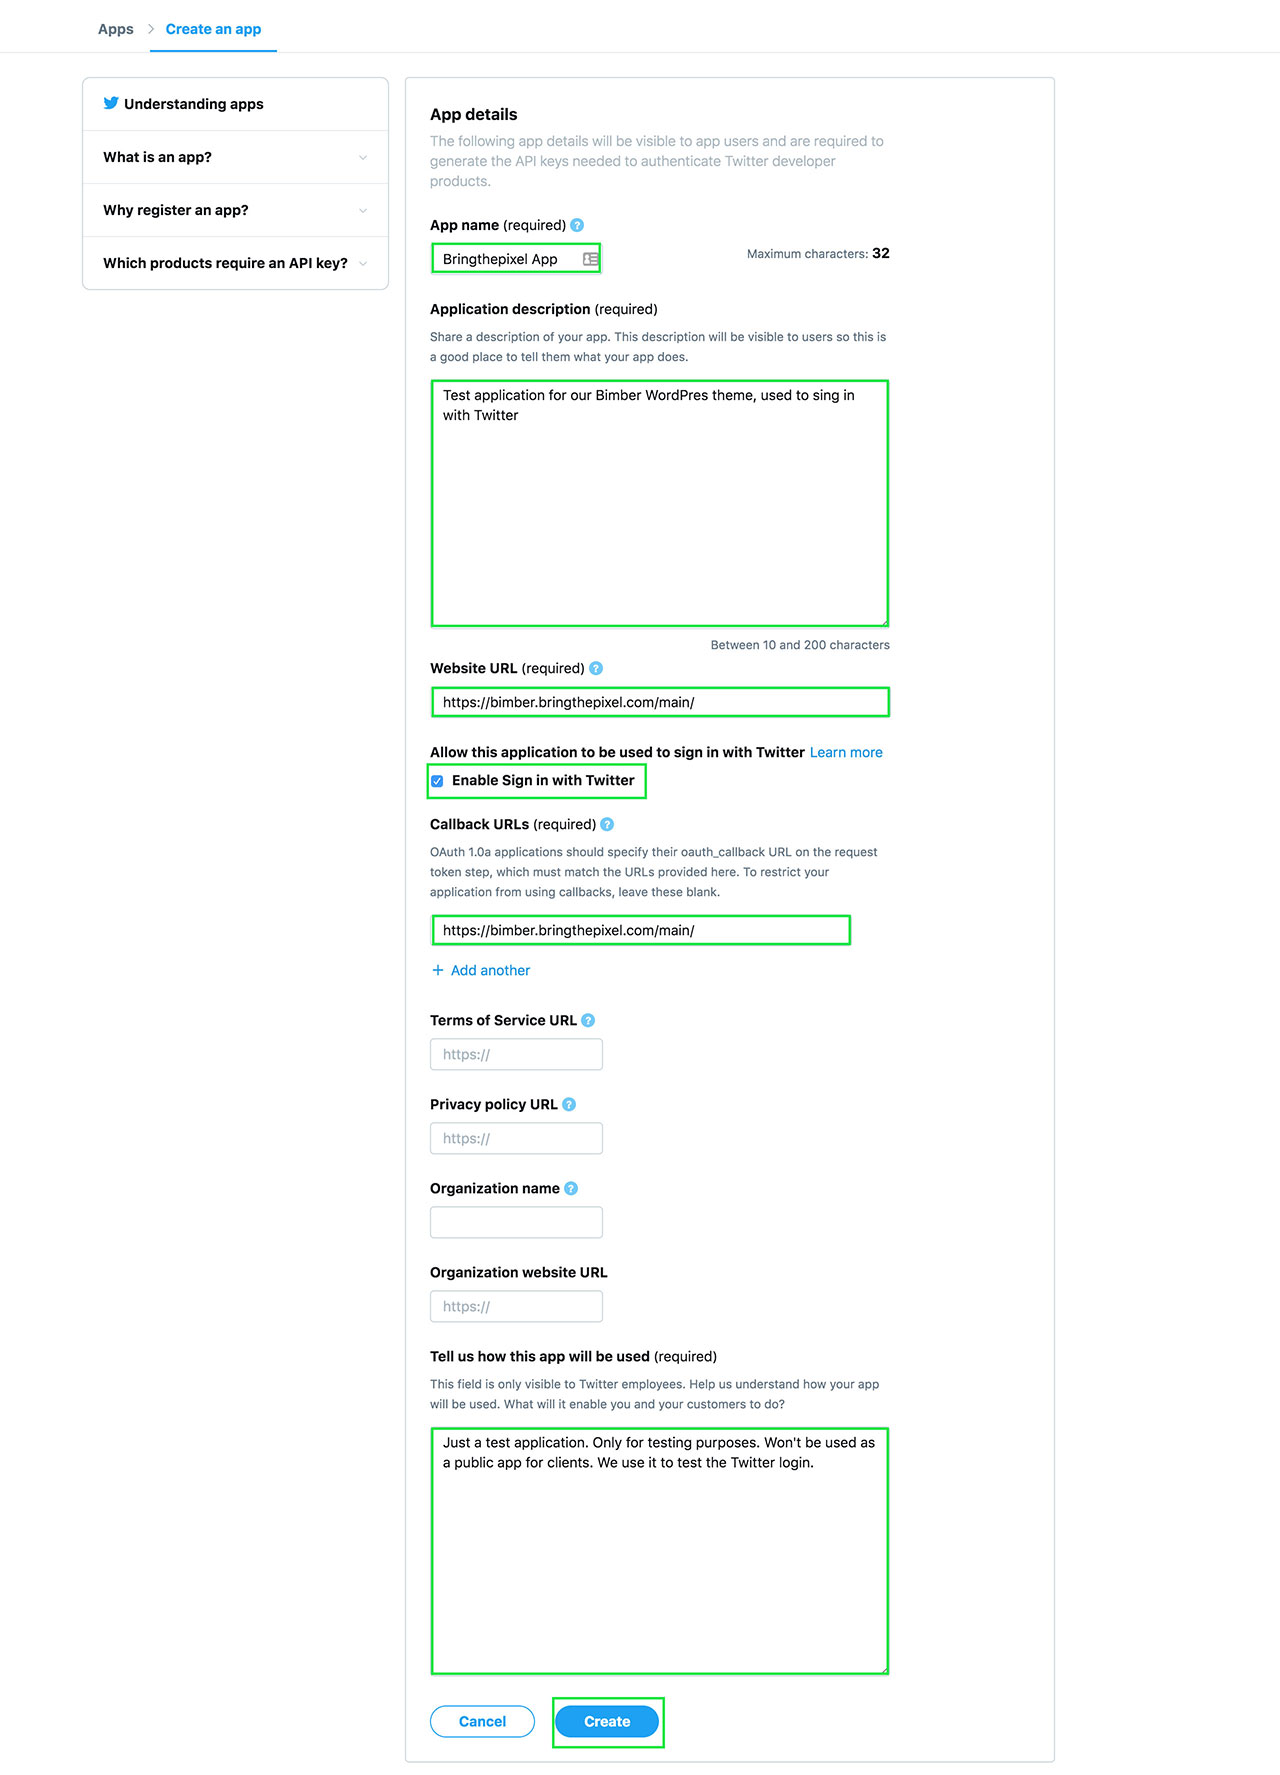
- Fill in the required fields:
- App name – has to be unique
- Application description – explain what your app is built for
- Website URL – your site’s homepage URL
- Enable Sign in with Twitter
- Callback URLs – the same as Website URL but ends with /
Wrong URL: https://your-website.com
Correct URL: https://your-website.com/ - Tell us how this app will be used – explain it’s for social login on your site
- Click Create button
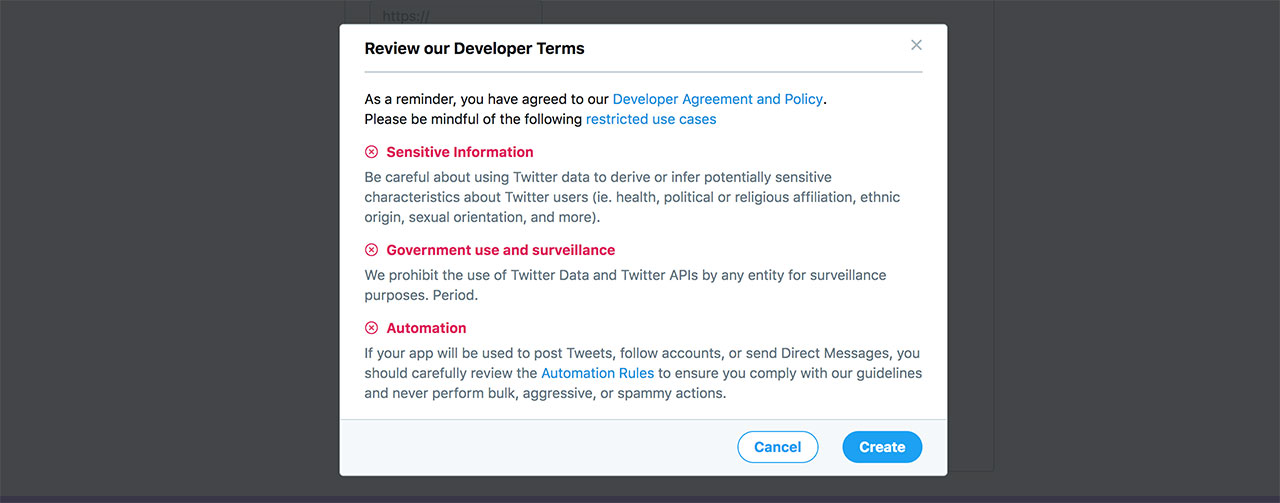
- Read Developer Terms and click Create
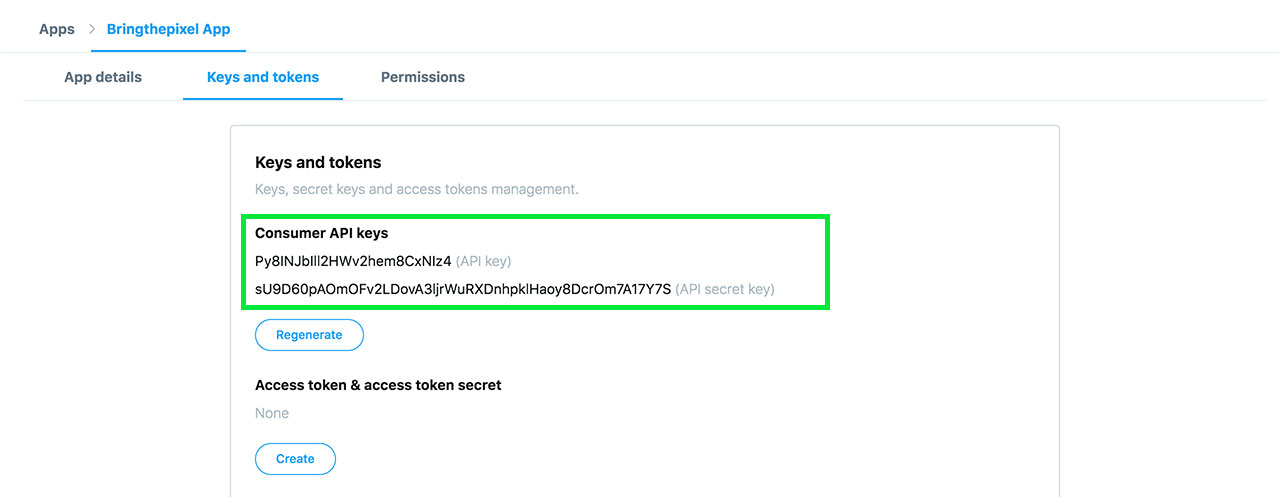
- Switch to Keys and tokens tab
- From Consumer API keys section, please copy API key and API secret key
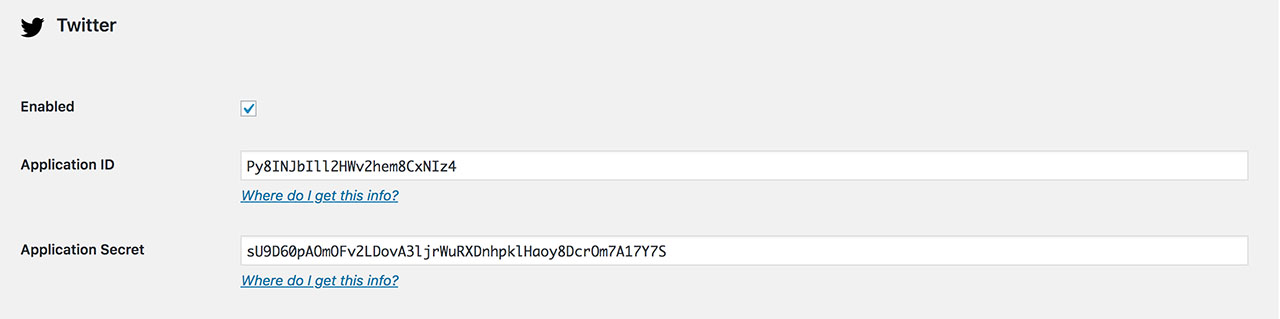
- Go back to WP admin panel › Settings › Snax › Social Login › Networks page
and past the created application credentials into the Twitter fields. Application API key into Snax Application ID and API secret key into Application Secret - Make sure that Enabled box is checked
- Save changes
Since Instagram has been taken by Facebook, the login process is now managed by Facebook as well. The legacy API was valid until September 30, 2020.
To enable authentication with LinkedIn, please follow the steps:
- Go to https://www.linkedin.com/developers/apps
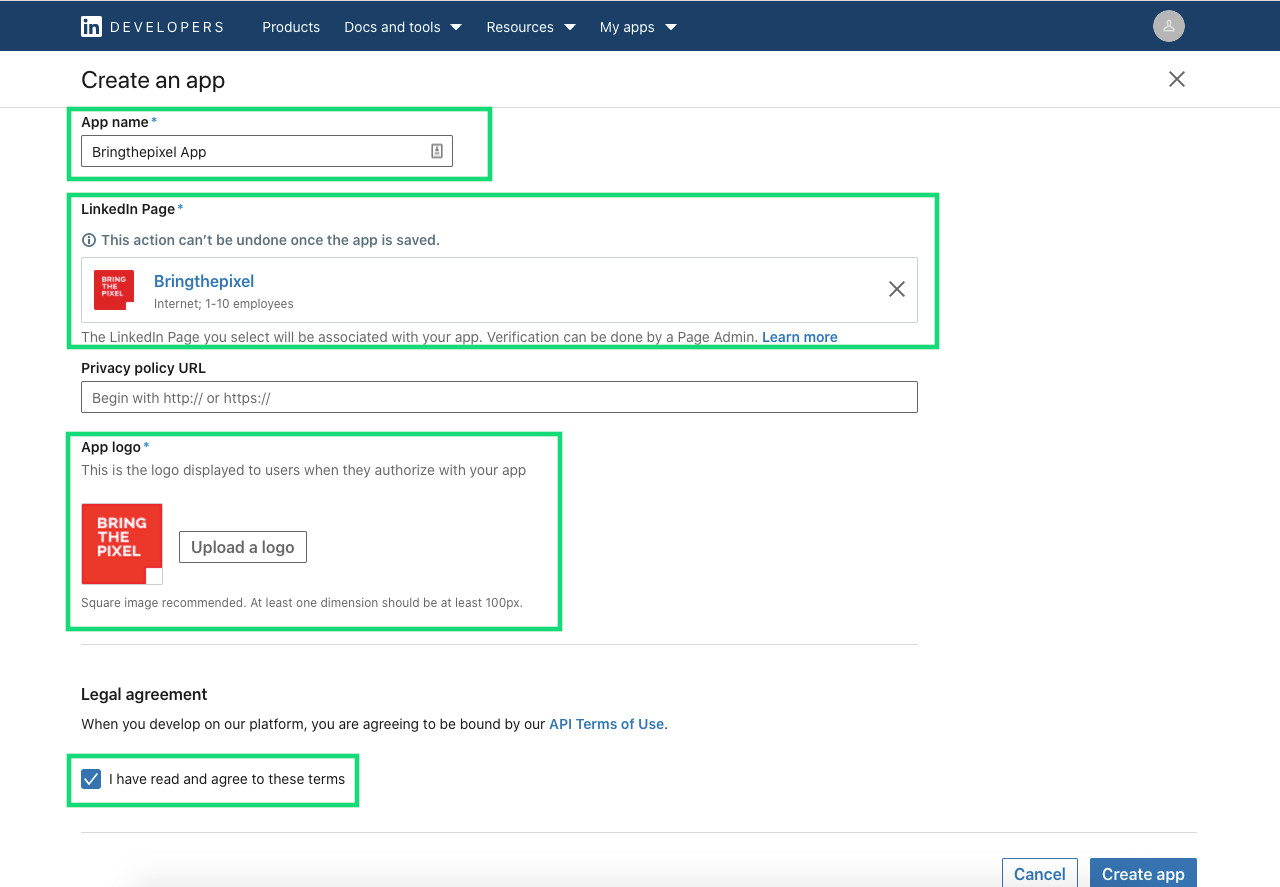
- Click the Create app button
- Fill in the required fields:
- App name
- LinkedIn Page – you have to select your company page. Create a new one if you don’t have it already.
It’s a required step as your application has to be verified by company admin later in the verification process. - App logo – must be square and at least 100×100 pixels
- Agree to the legal terms
- Click the Create app button
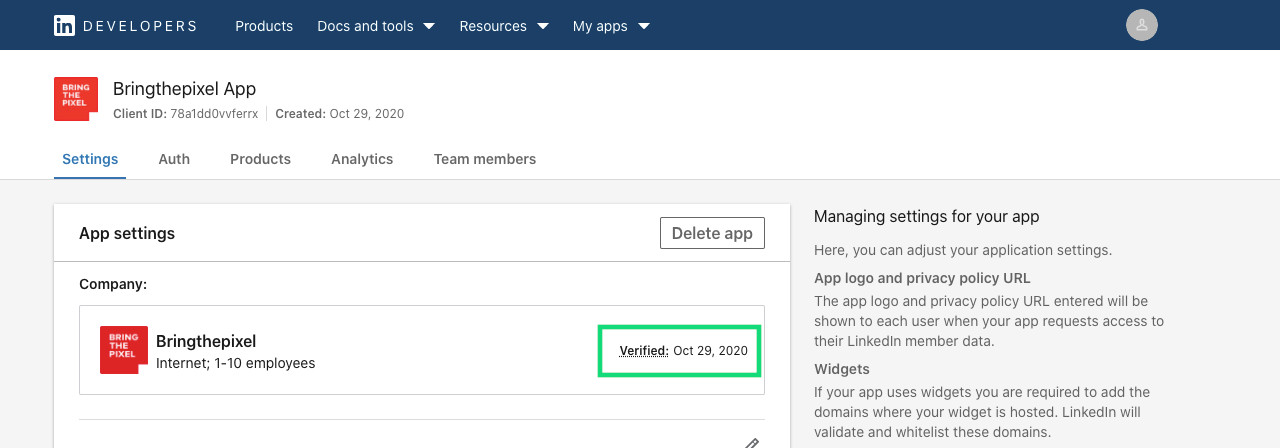
- In the App settings, click the Verify button and follow the steps of creating a new page
- After successful verification, you should see the Verified status next to your company name
- Return back to your site and go to WP admin panel › Settings › Snax › Social Login › Networks page
- In LinkedIn section, click Where do I get this info? link
- You should see Redirect URL, copy it
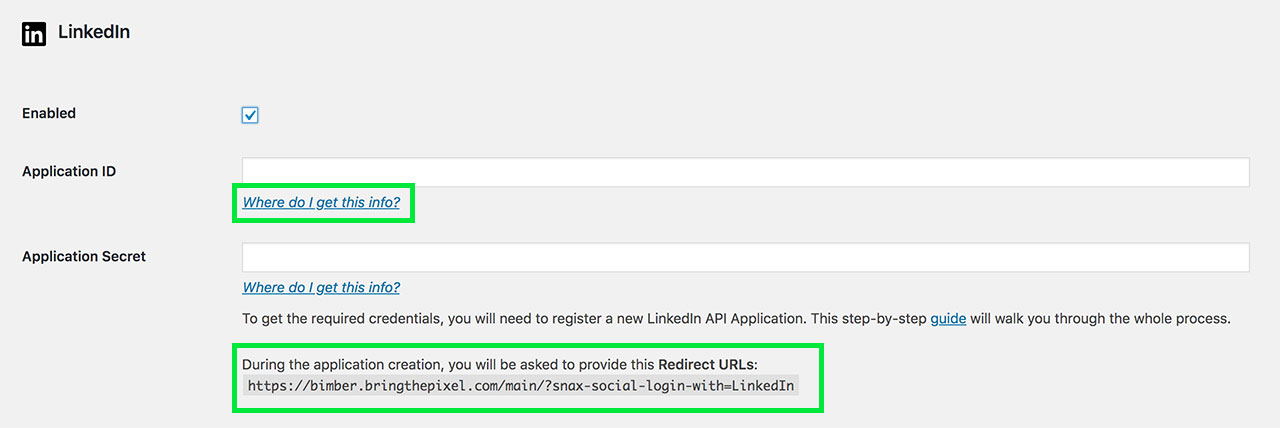
- Now, back in the LinkedIn application, click the Auth tab
- Scroll down to OAuth 2.0 settings
- Paste the copied URL into Authorized redirect URLs for your app field and Save Changes

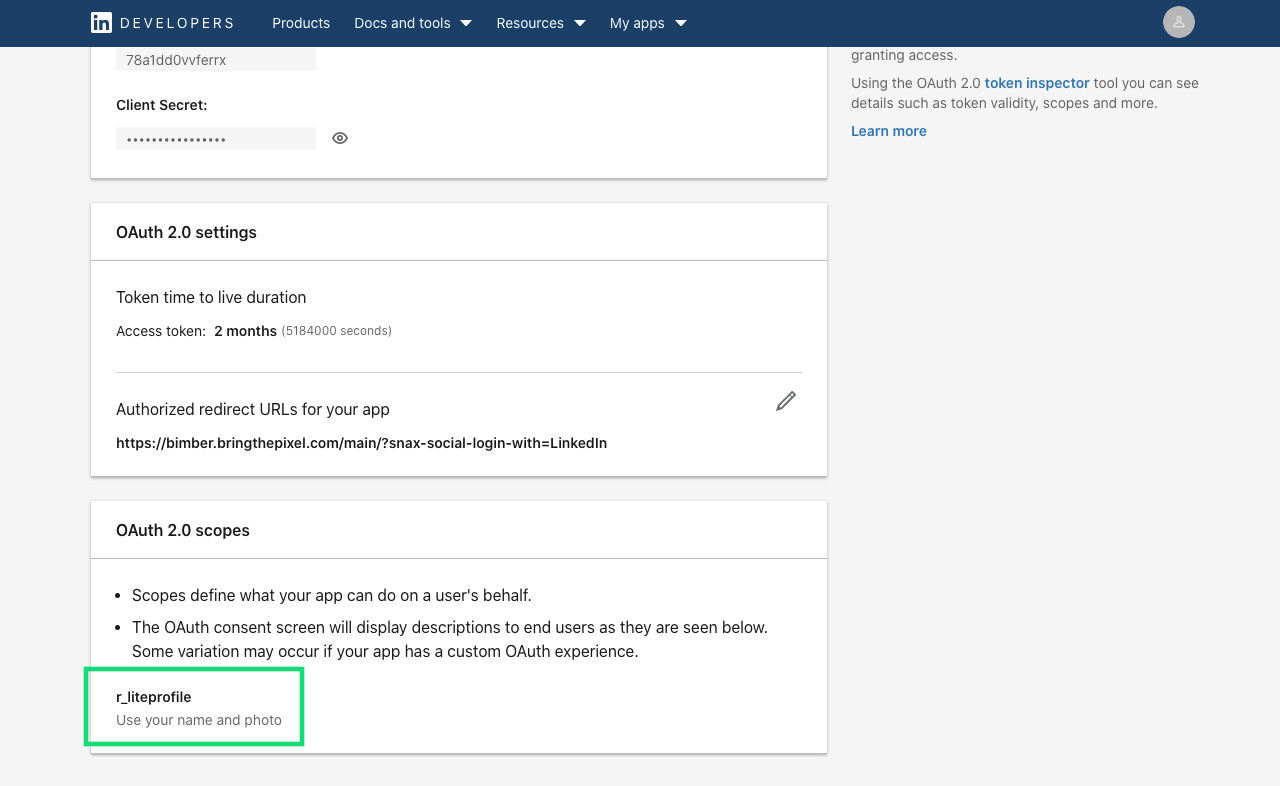
- From the Application credentials section (in the same Auth tab, the screen above), please copy the Client ID and Client Secret
- Go back to WP admin panel › Settings › Snax › Social Login › Networks page
and paste the created application credentials into the LinkedIn fields. Application Client ID into Snax Application ID and Client Secret into Application Secret - Make sure that the Enabled box is checked
- Save changes
- We’re almost done. The last step required to allow users to sign in with LinkedIn is to define scopes. To do so, please select the Products tab and click the Select button for the Sign in with LinkedIn product

- After successful verification, you should see the Sign In with Linked product on top of the list, and without the Select button
- To check if all went fine, please navigate to the Auth tab, scroll down to the OAuth 2.0 scopes section and check if the r_liteprofile scope is there
VKontakte
To enable authentication with Vkontakte (vk.com), please follow the steps:
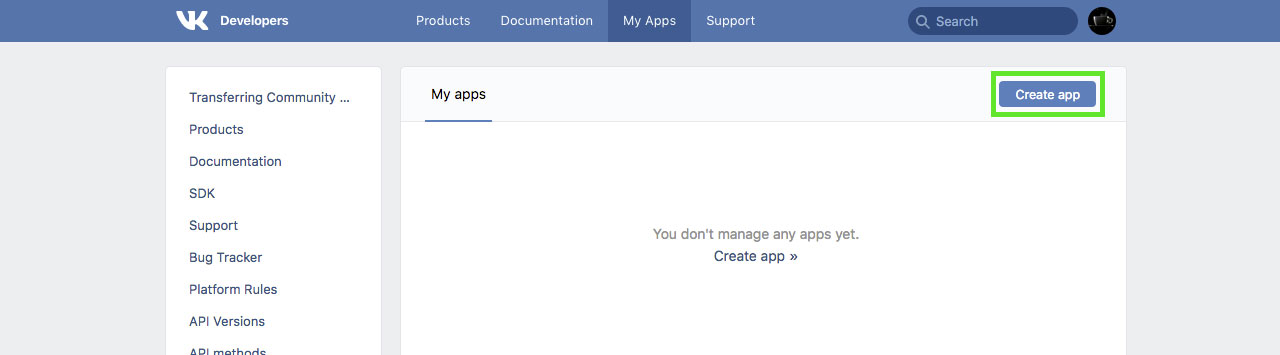
- Go to https://vk.com/apps?act=manage
- Click Create app button
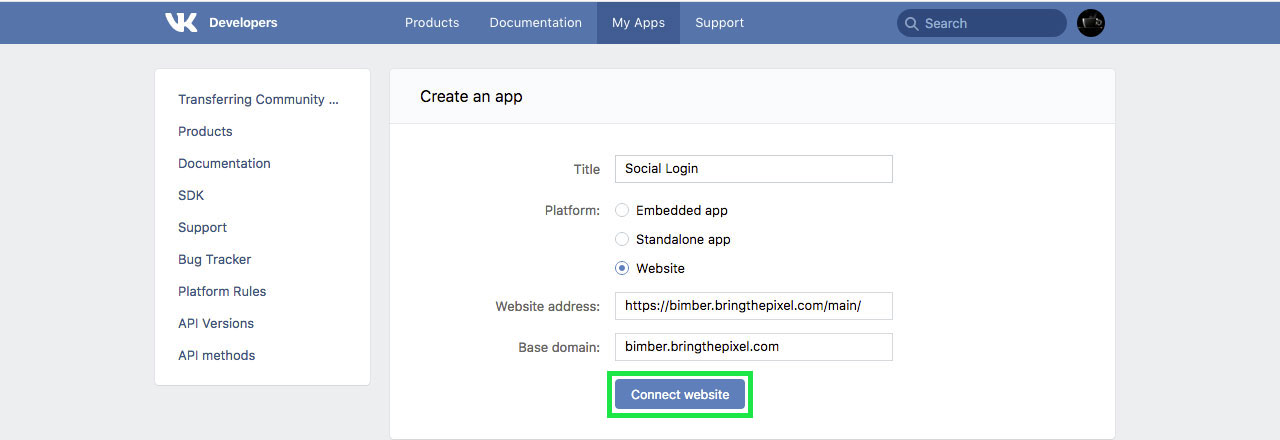
- Fill in required fields:
- Title
- Platform – choose Website
- Website address – your site’s full URL
- Base domain – just site’s domain, without http(s):// or subdirs
- Click Connect website button
- From Settings section, please copy App ID and Secret key
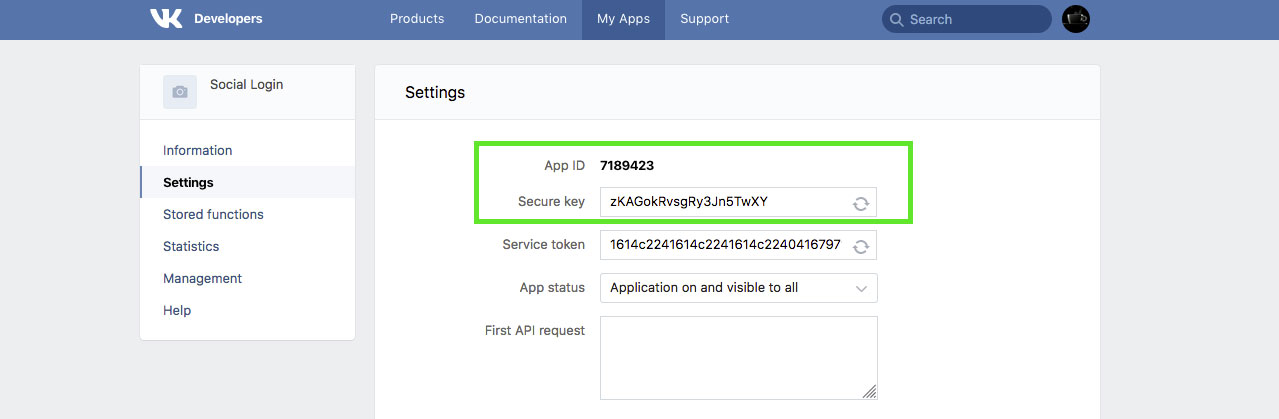
- Go back to WP admin panel › Settings › Snax › Social Login › Networks page
and paste the created application credentials into the VKontakte fields. Application App ID into Snax Application ID
and Secret key into Application Secret - Make sure that Enabled box is checked
- Save changes
Odnoklassniki
To enable authentication with Odnoklassniki (ok.ru), please follow the steps:
- Open https://ok.ru/devaccess to gain developer rights. Link an email to your account. Check your mailbox to confirm the email
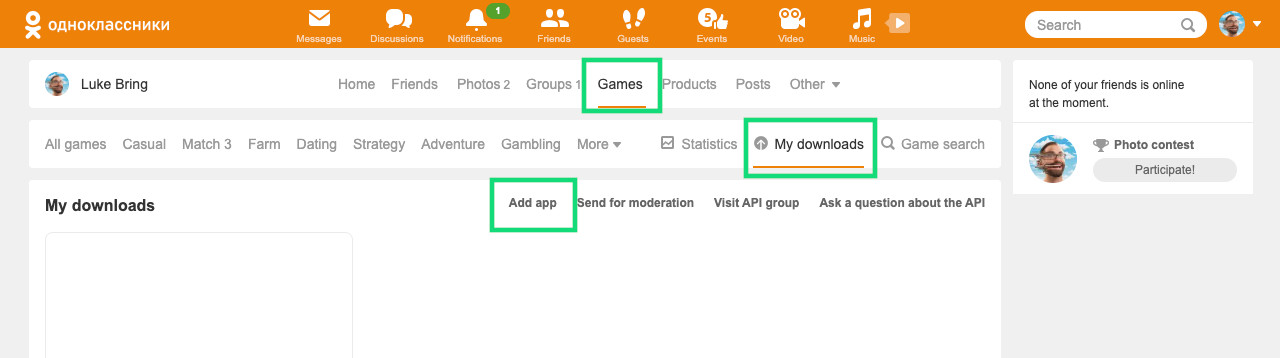
- After obtaining developer rights, go to your account settings on OK.ru, select Games, then My downloads and click Add app
- Fill in required fields:
- Title
- Short name
- Description
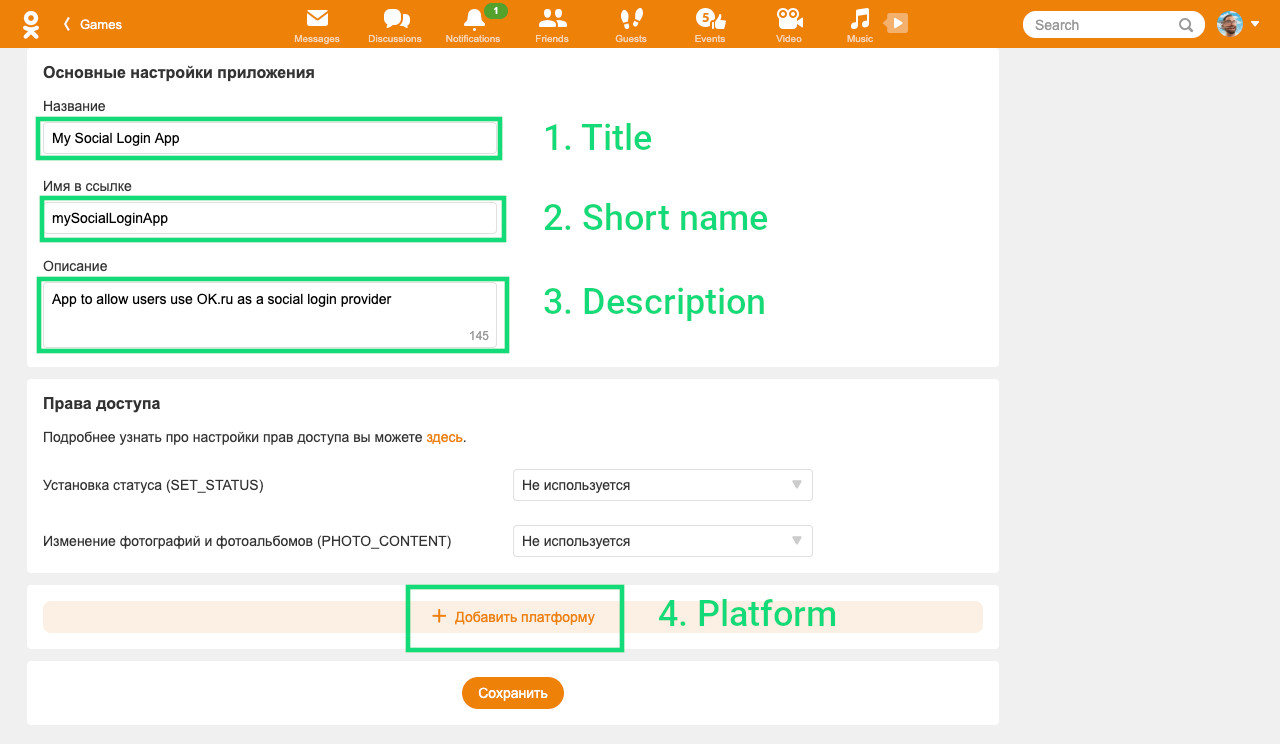
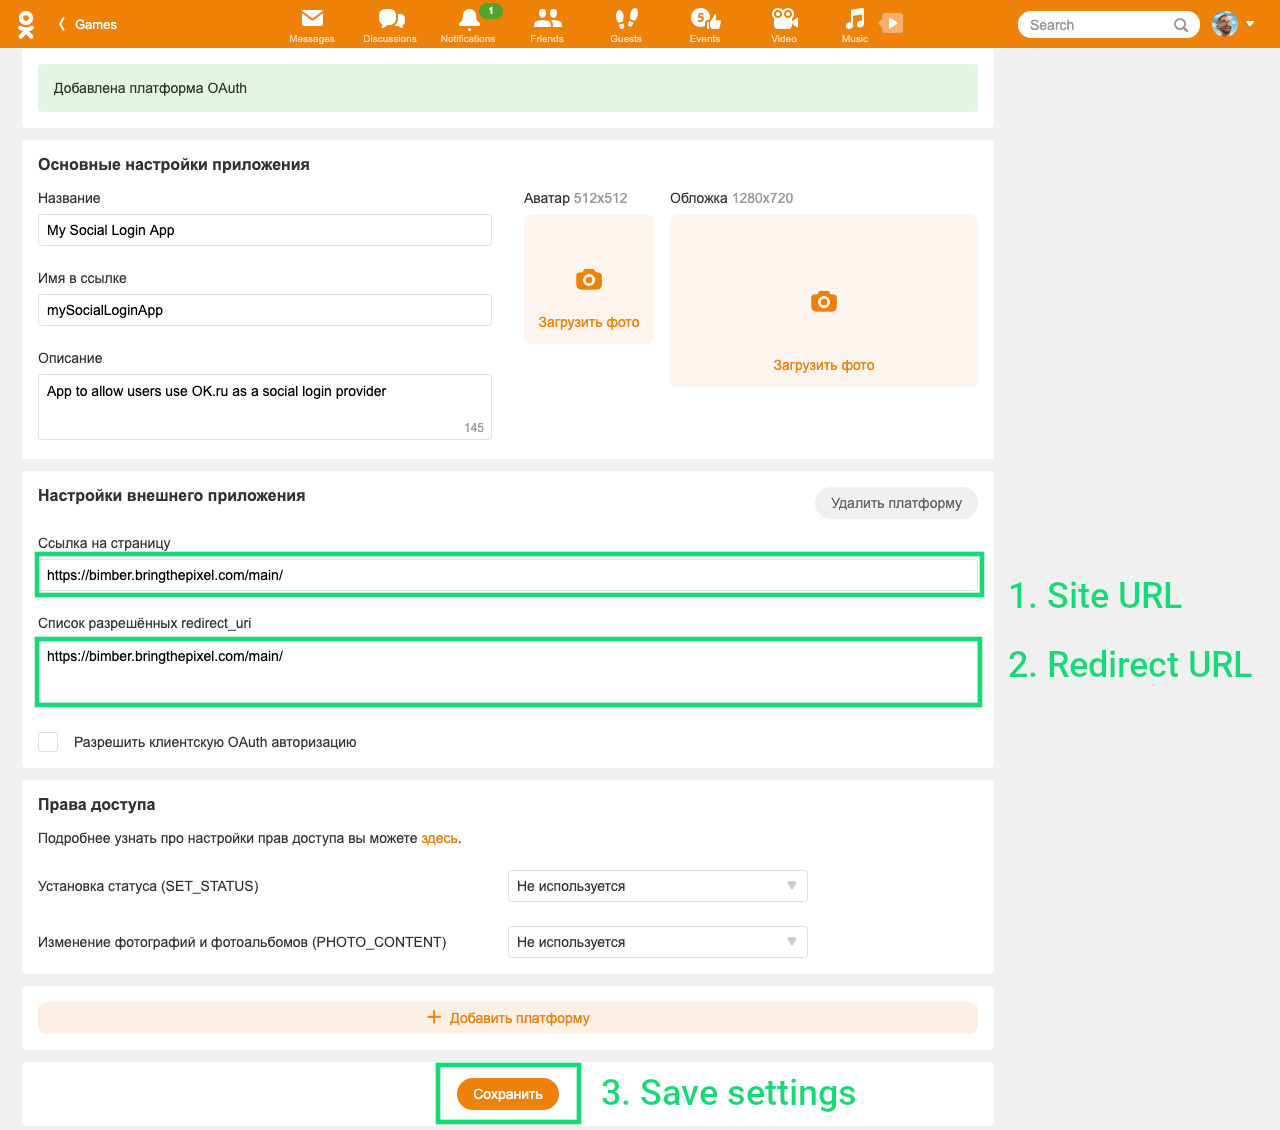
- Click Add platform button and choose OAuth
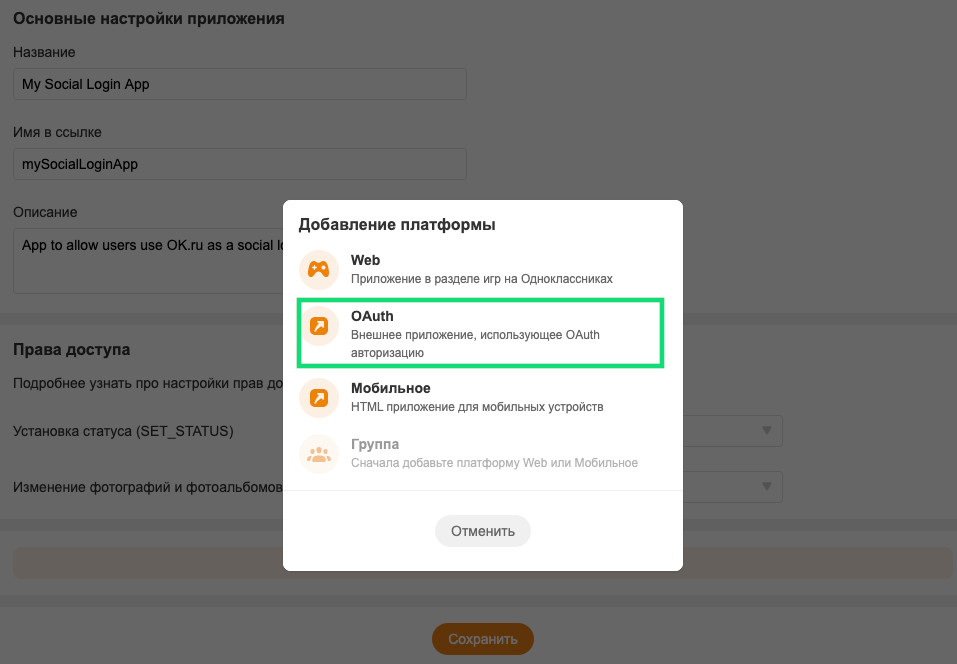
- After choosing the OAuth platfrom, two new fields should show up
- Fill in:
- Site URL – your site’s full URL
- Redirect URL – the same as Site URL
- Save changes
- On your email you will get your OAuth credentials Application key, Public key and Secret key.

- Go back to WP Dashboard > Settings > Snax > Social Login > Networks page and paste the created application credentials into the Odnoklassniki fields. All fields are required: ID, key, and secret
- Make sure that Enabled box is checked
- Save changes
Multisite Support
The social login module supports WordPress Network / Multisite sites. When a user logs into a site within a network for the first time, his account is created.
The user’s role is set based on the network’s default role (Snax sets it to the Snax Author by default).
When the user’s account already exists and the user logs into a different site within the same network, his capabilities
are extended and the same role is granted to the user to that new site.
General Data Protection Regulation (GDPR)
GDPR is an EU privacy regulation that enforces a certain standard of handling and obtaining user data.
Bimber has certain ready-made integrations so you can make your site GDPR ready in a few simple steps.
The WP GDPR Compliance plugin assists website and webshop owners
to comply with European privacy regulations known as GDPR. By May 24th, 2018 your site or shop has to comply to avoid large fines.
Requirements
Snax uses the WP GDPR Compliance plugin to provide GDPR integration.
Please make sure you have it activated.
Workflow
When the GDPR integration is enabled, a user will be asked to accept your privacy policy terms before logging in
with any of available social networks.

Enable
To enable the GDPR integration, please:
- Go to the WP admin panel › Settings › Snax › Social Login section
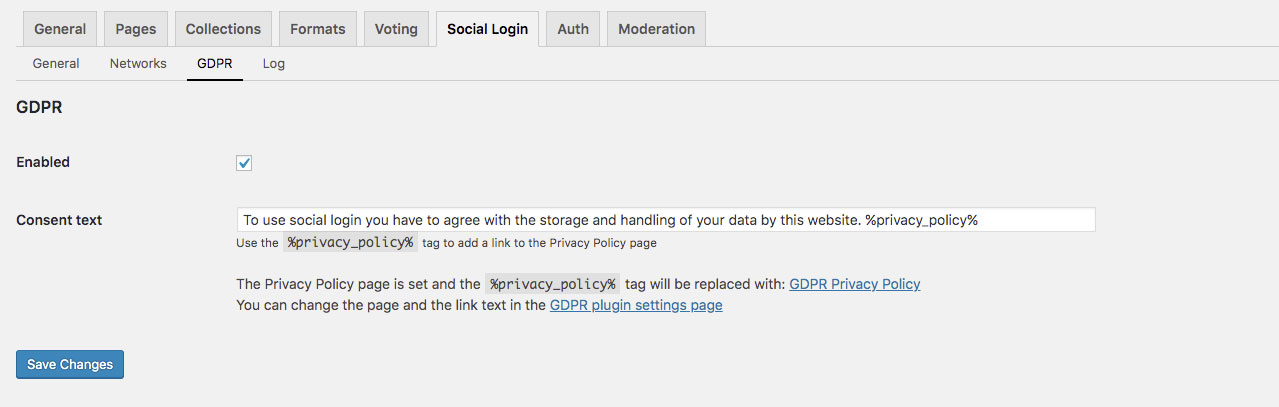
- Choose the GDPR tab
- Check the Enabled box
- Fill in the Consent text for your users
- Add the
%privacy_policy%tag to the Consent text. It will be replaced with the target Privacy Policy page - The Privacy Policy page can be set in the GDPR plugin’s setting page
Instagram App Review
To use your Instagram application, it has to be in Live Mode or your Instagram user’s account has to be added to it as a test user.
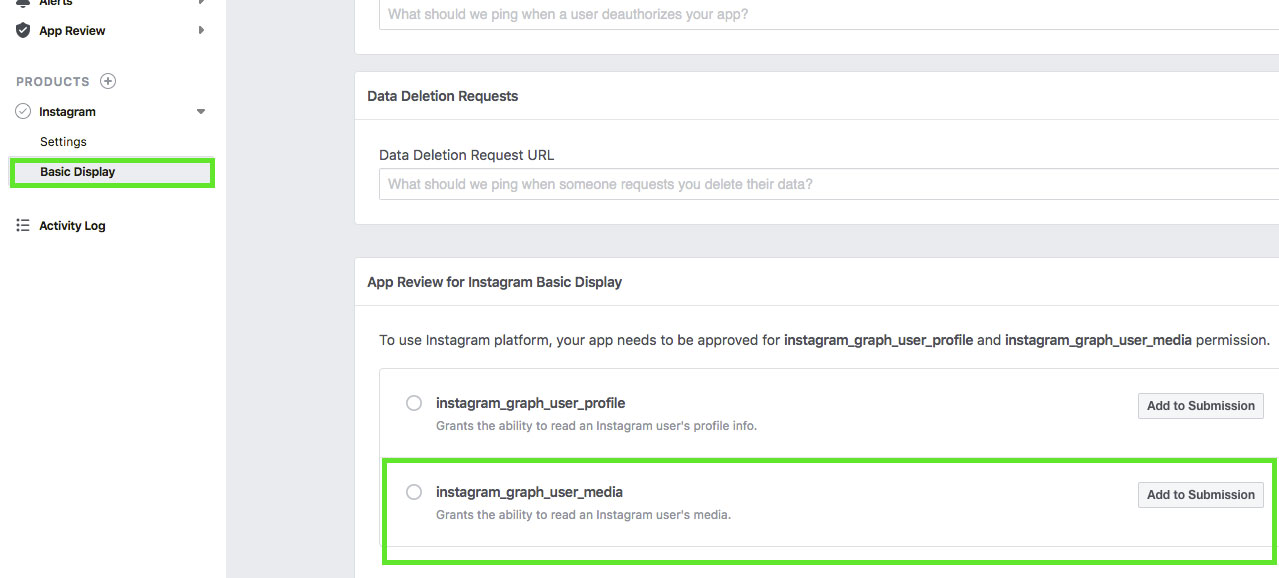
Switch to Live Mode
To go Live with your app, you have to submit it for a review. Go back to your Facebook Developer Account,
then Instagram > Basic Display and choose instagram_graph_user_media submission option.
Add a test user
Your application doesn’t have to be Live to allow you test it. All you need is to add a test user. To do so, please do as follows:
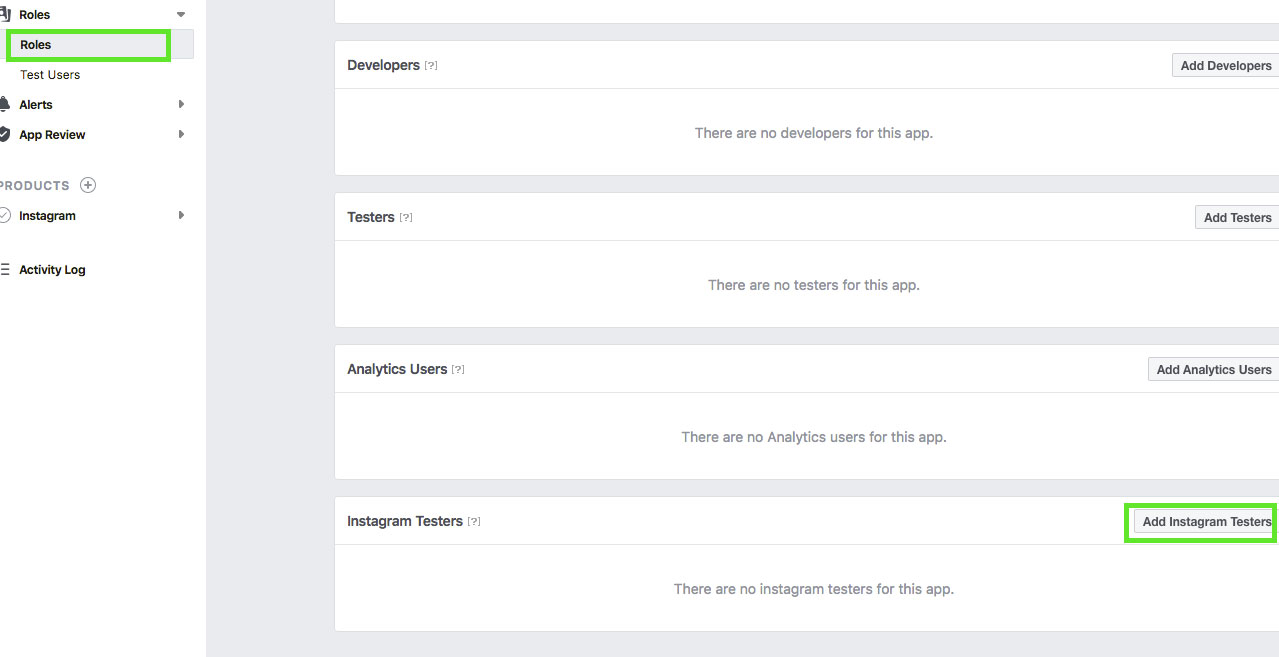
- Go back to your Facebook Developer Account
- Navigate to Roles > Roles and scroll down to the Instagram Testers section.
Click Add Instagram Testers and enter your Instagram account’s username and send the invitation.
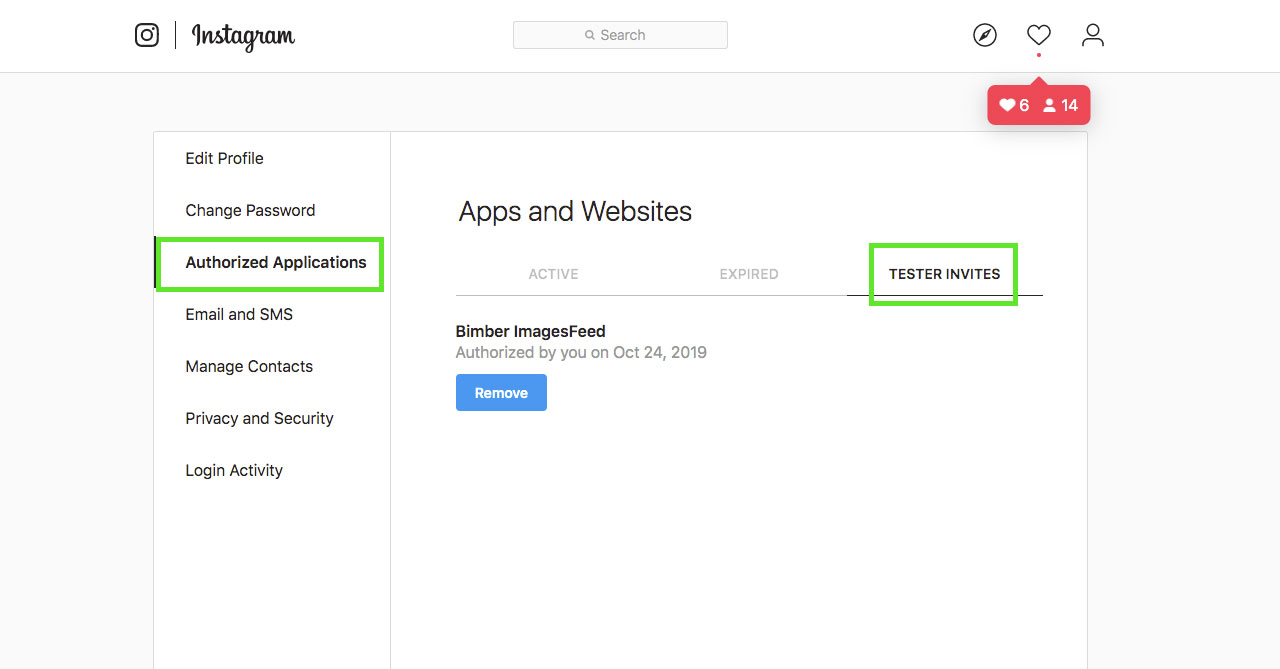
- Go to your Instagram Account
- Click Edit Profile
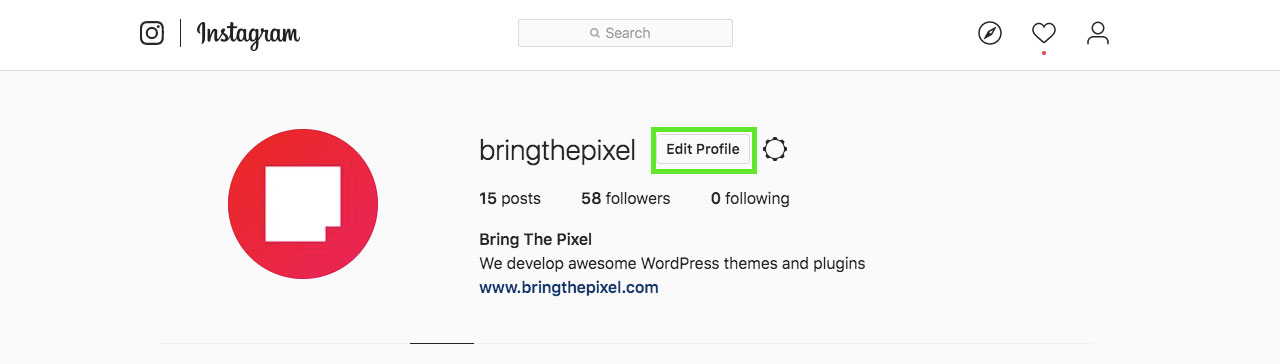
- Navigate to Authorized Applications
- Choose Tester Invites and accept the invitation
- Your Instagram account is now eligible to be accessed by your Facebook app while it is in Development Mode
Debugging
To enable the social login debug mode, please do as follows:
- Go to the WP admin panel › Settings › Snax › Social Login section
- Choose the Log tab
- Check the Enabled box
- Save changes
- From now on, all login sessions (ended with success or failure) will be listed here to allow you to trace all kind of problems. When you want to report a problem
to the support center, please attach a session log. - It’s recommended to disable the debug mode when going live