The header builder allows you to compose any header layout using an easy and intuitive drag & drop interface.

Quick Start
To start building your header, please do as follows:
- Open the WP Dashboard › Appearance › Customize › Header › Builder panel
- Click the Open Header Builder button.
- Choose header type (e.g. Desktop)
- Use drag & drop interface to move header elements between rows
- Click on an element (e.g. Logo) to open its settings panel
- Publish changes
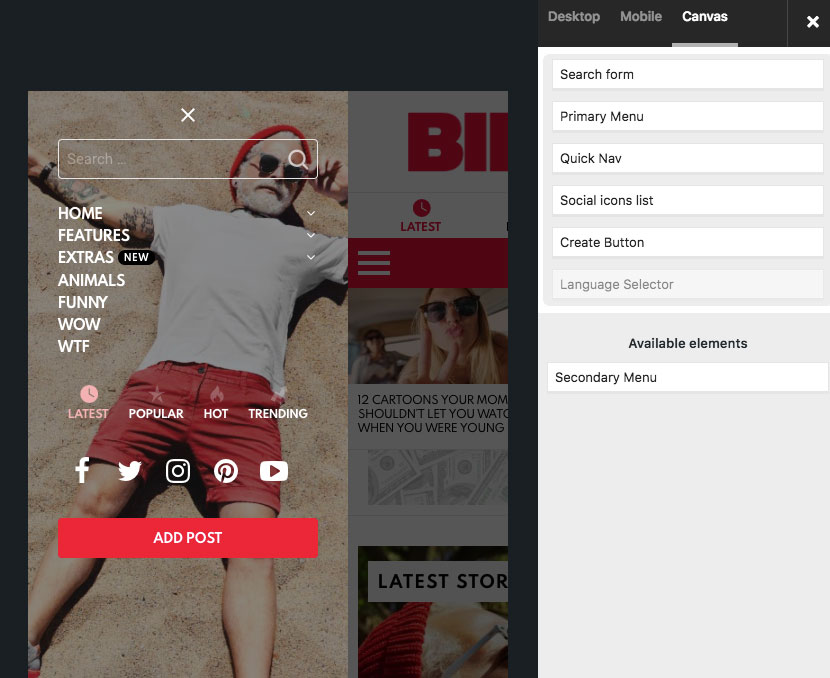
Header types
The builder allows you to compose separately 3 types of headers:
- for Desktop devices (see above).
- for Mobile devices.

- for Canvas.


Pre-made compositions
The builder offers a few pre-made header compositions for a quick start. Please do as follows to start working from a pre-defined layout:
- Open the WP Dashboard › Appearance › Customize › Header › Builder panel
- Click one of the available Compositions.
- Adjust your header.
- Publish changes
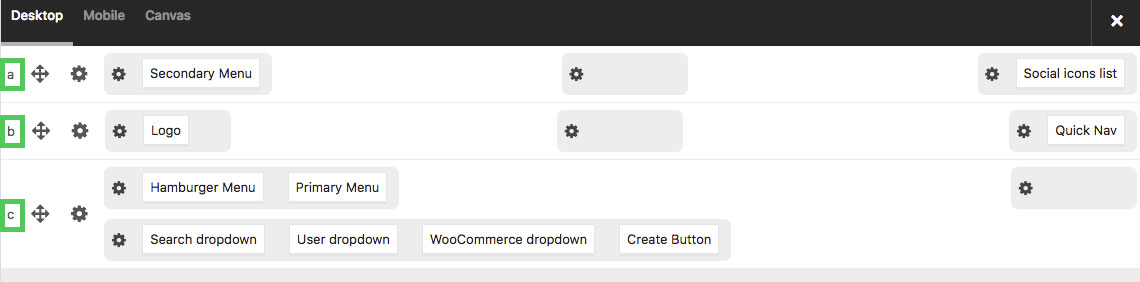
Rows
The header layout is divided into 3 rows (labeled as a, b, c). Every row has 3 cells (left, middle, right).
To reposition rows, use the ![]() icon next to it.
icon next to it.
To change row/cell properties, click the ![]() icon next to it.
icon next to it.
To move an element between rows/cell, just drag & drop it.
Sticky header
To make the header sticky, please click the cog icon next to a row you want to make sticky (screen, point 1)
and set the Sticky option to On (screen, point 2).
